• Home
  • Shop
    • Tops & Dresses
    • Pants & Skirts
    • Capes & Jackets
    • Rompers & Overalls
    • Ladies Sewing Patterns
    • Boys Sewing Patterns
    • Hats & Scarves
    • Miscellaneous Sewing Patterns
    • Pet Bed Sewing Patterns
  • My Account
    • Checkout
    • Cart
    • Logout
  • Affiliate Area
    • Info About The Affiliate Program
  • Blog
    • Whimsy Couture
      • Free Tutorials
      • Free Patterns
      • Pattern Sales
      • Giveaways
      • Pattern Shop
      • Reviews
      • Software for PDF patterns
    • DIY Crush Free Patterns & Tutorials
  • About
  • FAQ
  • Contact
  • Disclosure Policy
  • Skip to primary navigation
  • Skip to main content
  • Skip to primary sidebar
  • Home
  • Shop
    • Tops & Dresses
    • Pants & Skirts
    • Capes & Jackets
    • Rompers & Overalls
    • Ladies Sewing Patterns
    • Boys Sewing Patterns
    • Hats & Scarves
    • Miscellaneous Sewing Patterns
    • Pet Bed Sewing Patterns
  • My Account
    • Checkout
    • Cart
    • Logout
  • Affiliate Area
    • Info About The Affiliate Program
  • Blog
    • Whimsy Couture
      • Free Tutorials
      • Free Patterns
      • Pattern Sales
      • Giveaways
      • Pattern Shop
      • Reviews
      • Software for PDF patterns
    • DIY Crush Free Patterns & Tutorials
  • About
  • FAQ
  • Contact
  • Disclosure Policy

Whimsy Couture Sewing Patterns

Childrens Sewing Patterns

whimsy header

Blog

Free Tutorial On How To Embellish A Jumper

by 2 Comments

Yes, it’s that time again and school will start soon! In some parts it may have already so hurry to get your girls wardrobe ready! 🙂

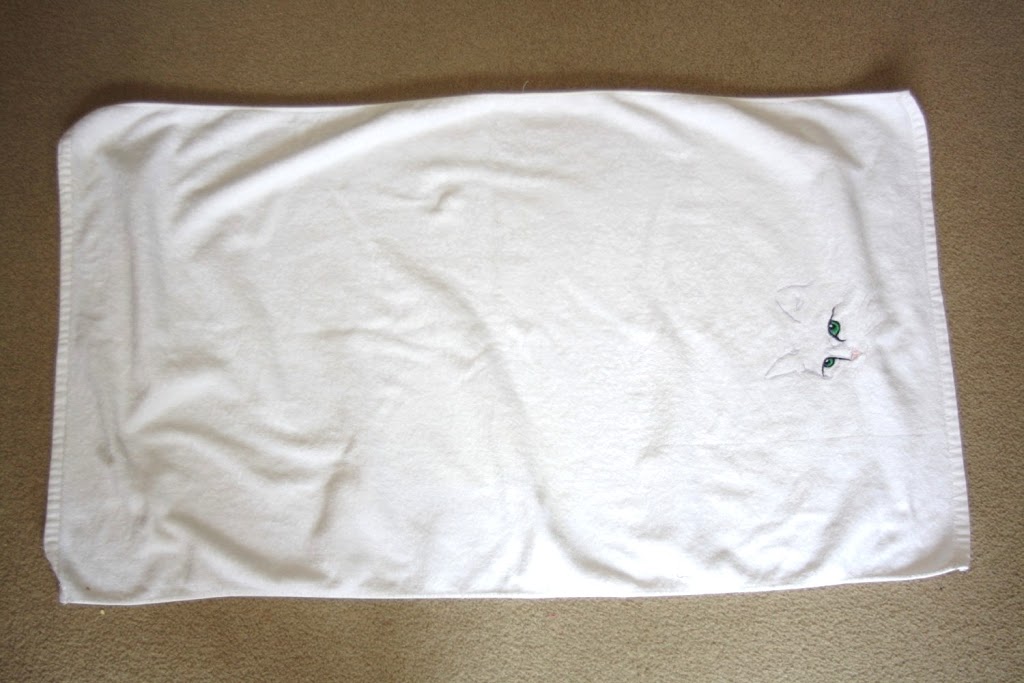
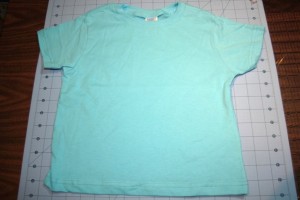
I purchased this adorable but pretty generic jumper at Goodwill for $2.00! Today I have a little tutorial for you on how to upcycle it a bit to make it just so pretty!
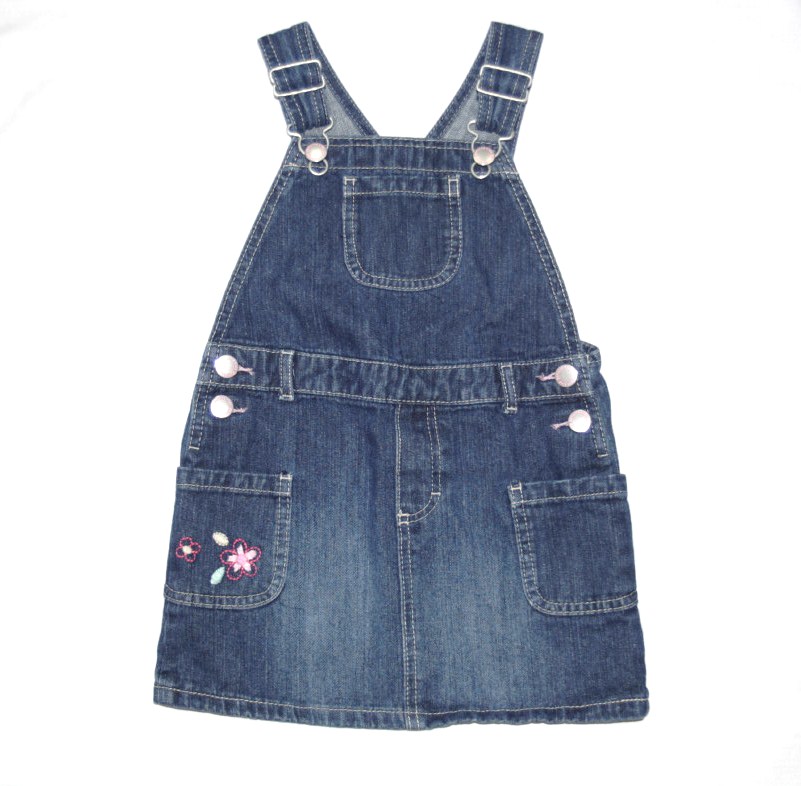
First I wanted to cover up the embroidery to give it some pizazz:

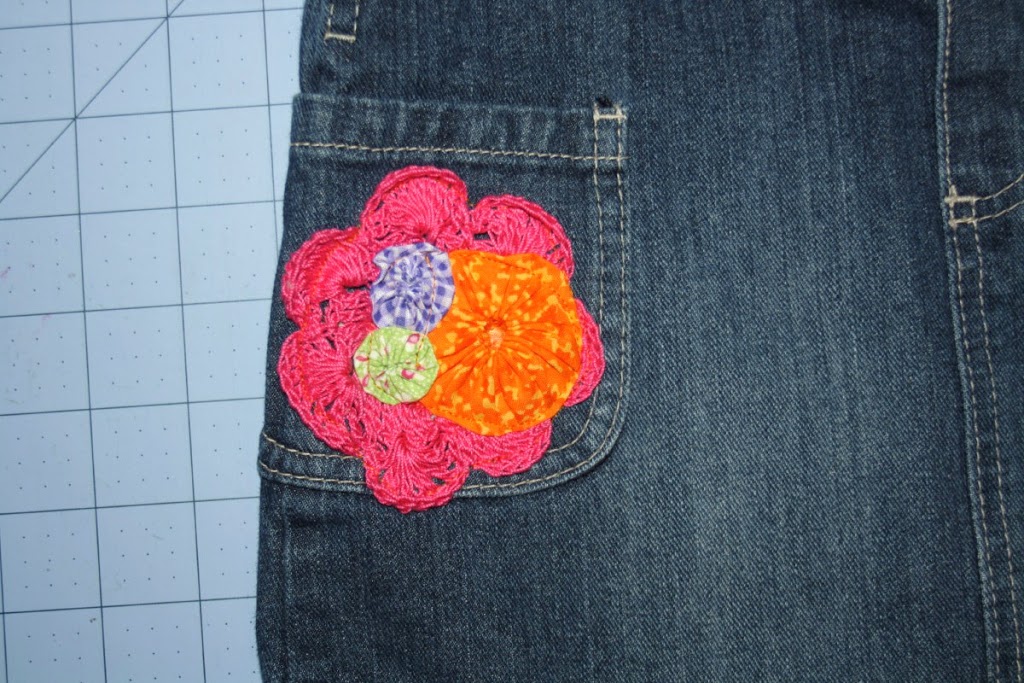
I pinned several little embellishment to the pocket:

Sewed them down:

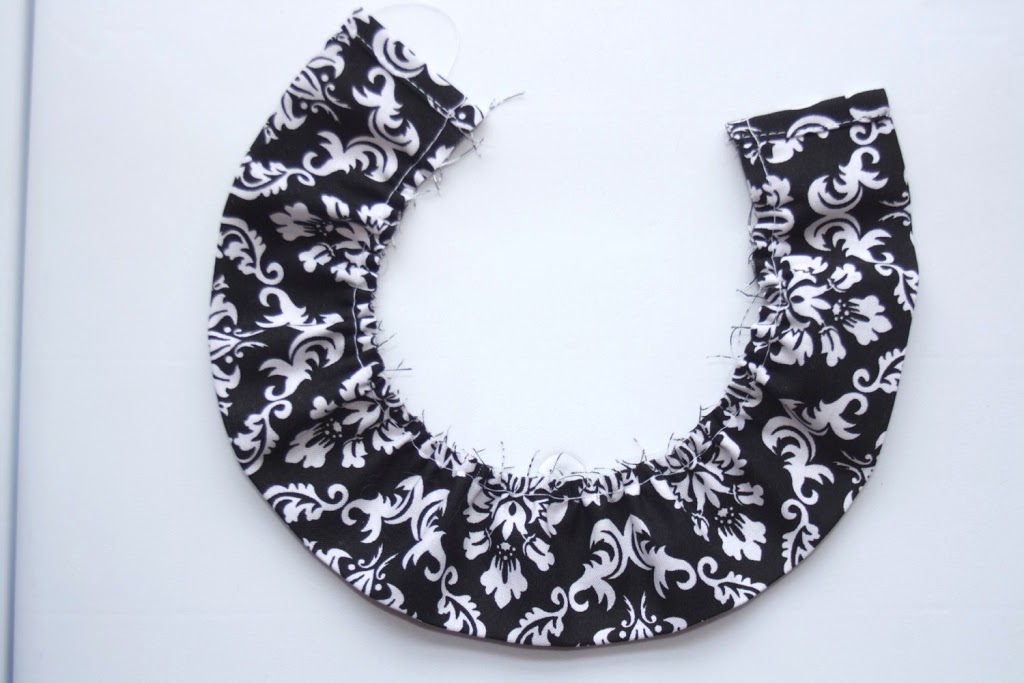
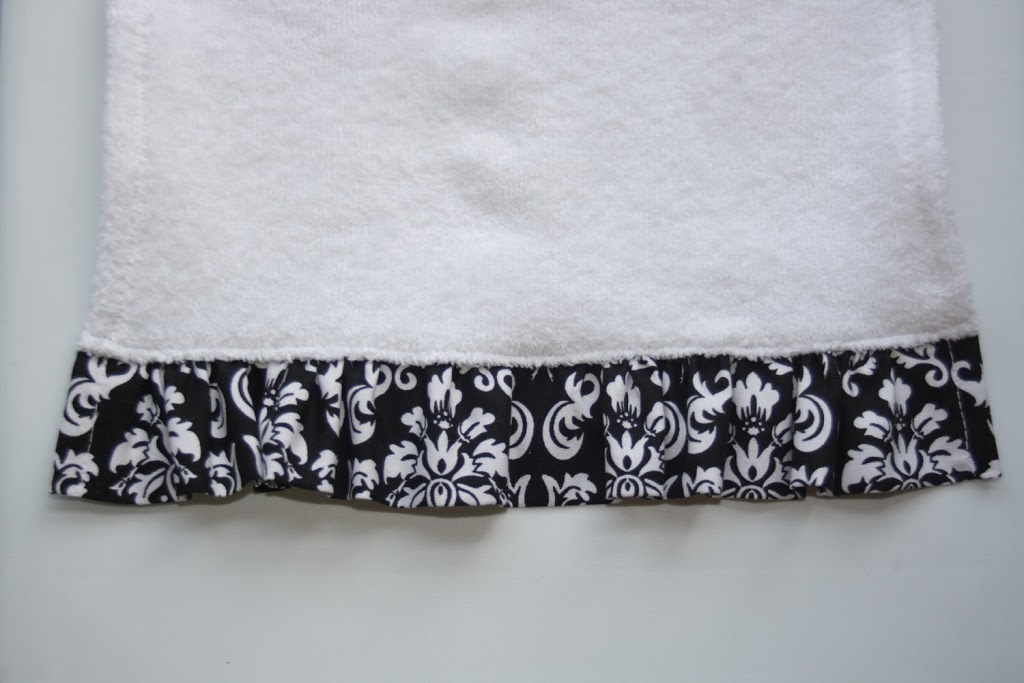
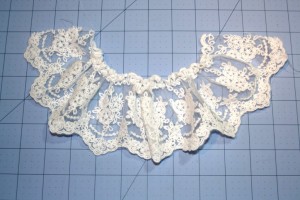
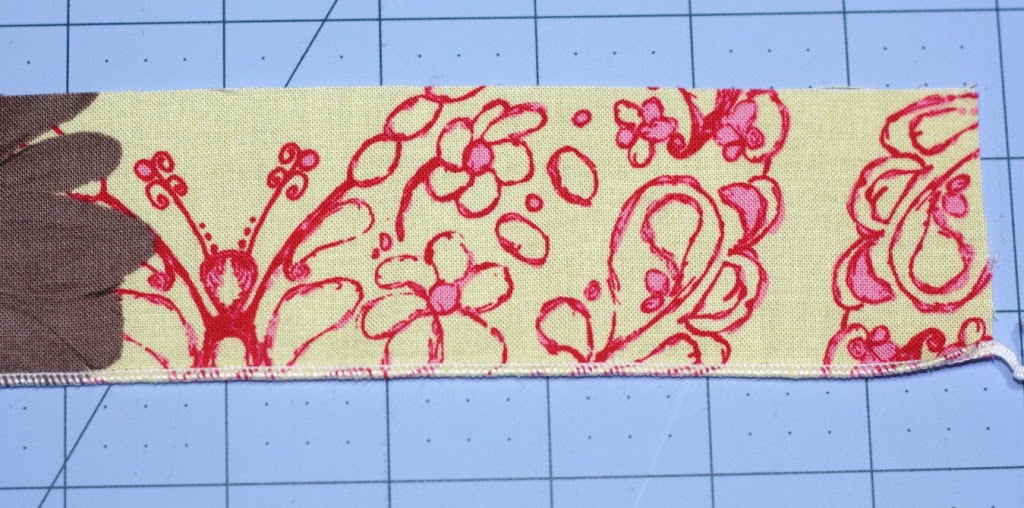
THEN comes my favorite material!!! Premade ruffle fabric! It’s gorgeous for many uses and today I am adding just a small strip to the bottom of my jumper!
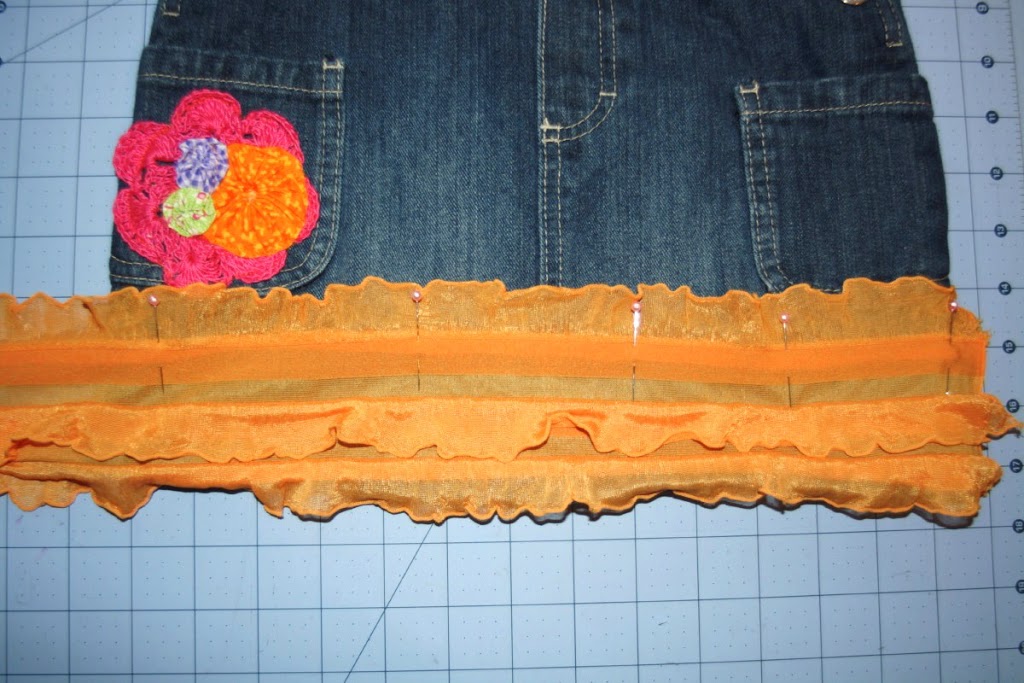
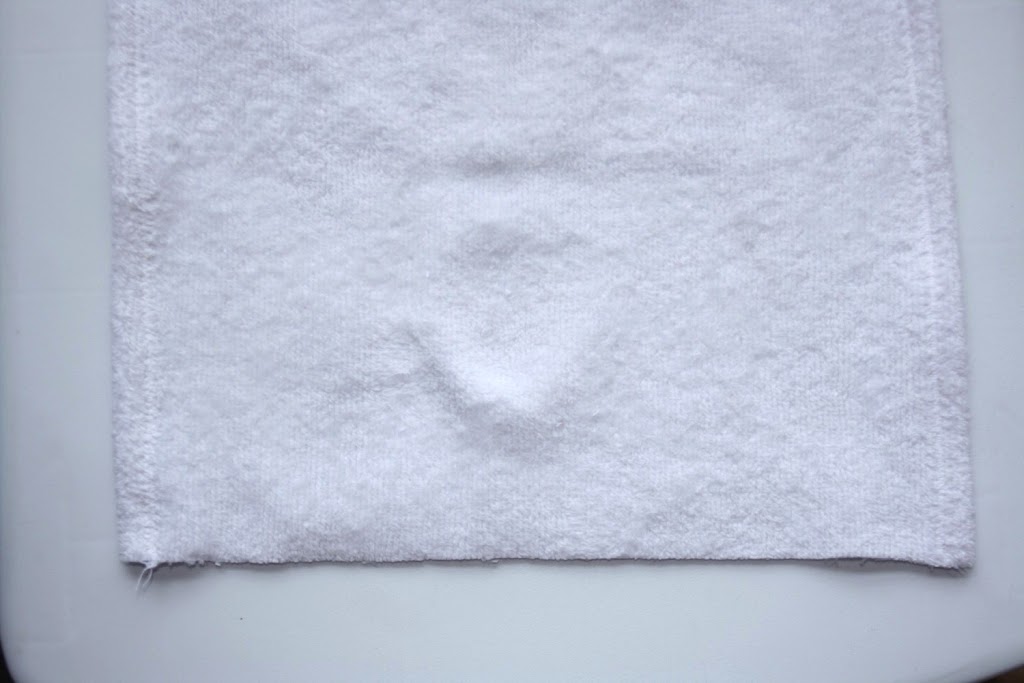
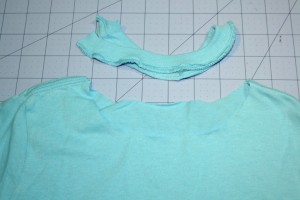
Cut it about 2″ longer than the circumference of your jumper (or shirt, dress etc. you get the idea):
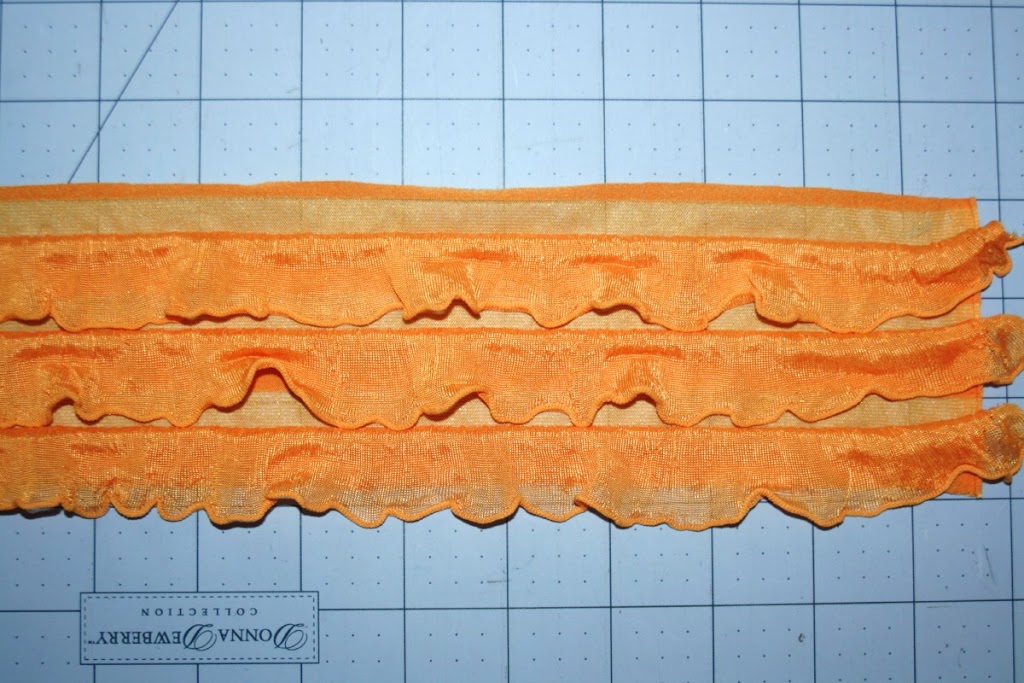
Place it onto your garment and tuck the top edge under:

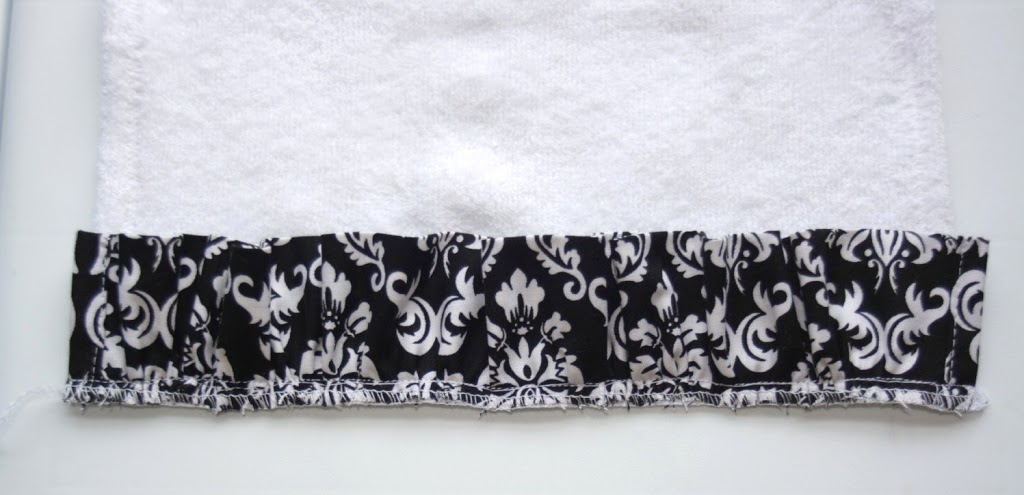
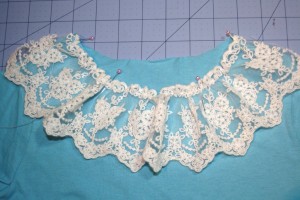
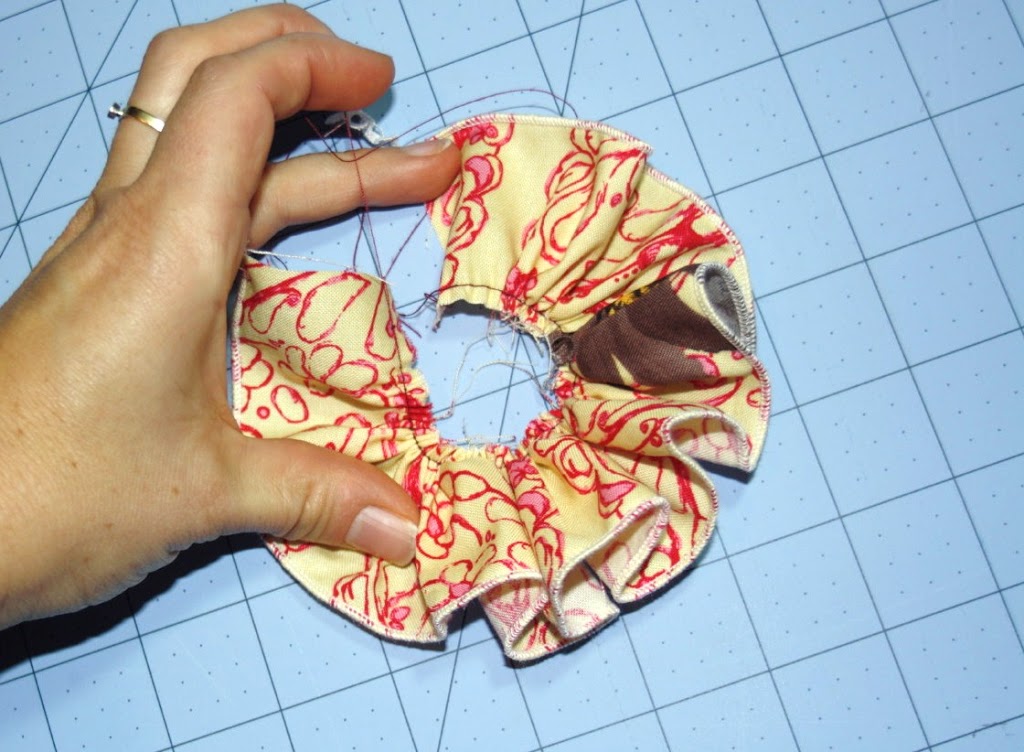
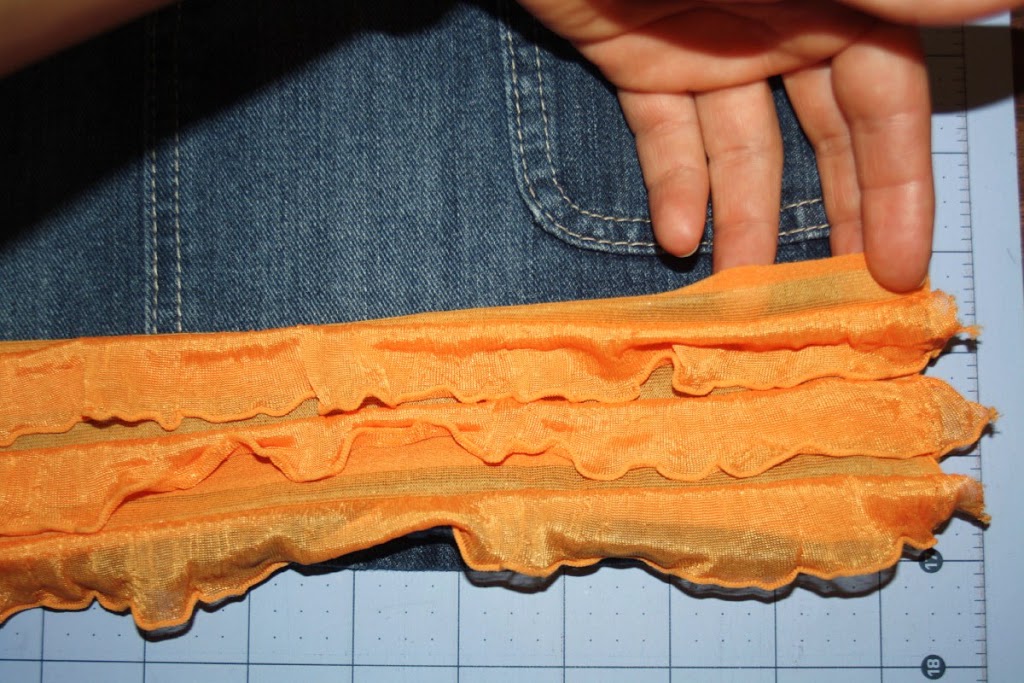
Then fold up the top ruffle and pin right under it. Pin it all the way around until you reach the beginning:


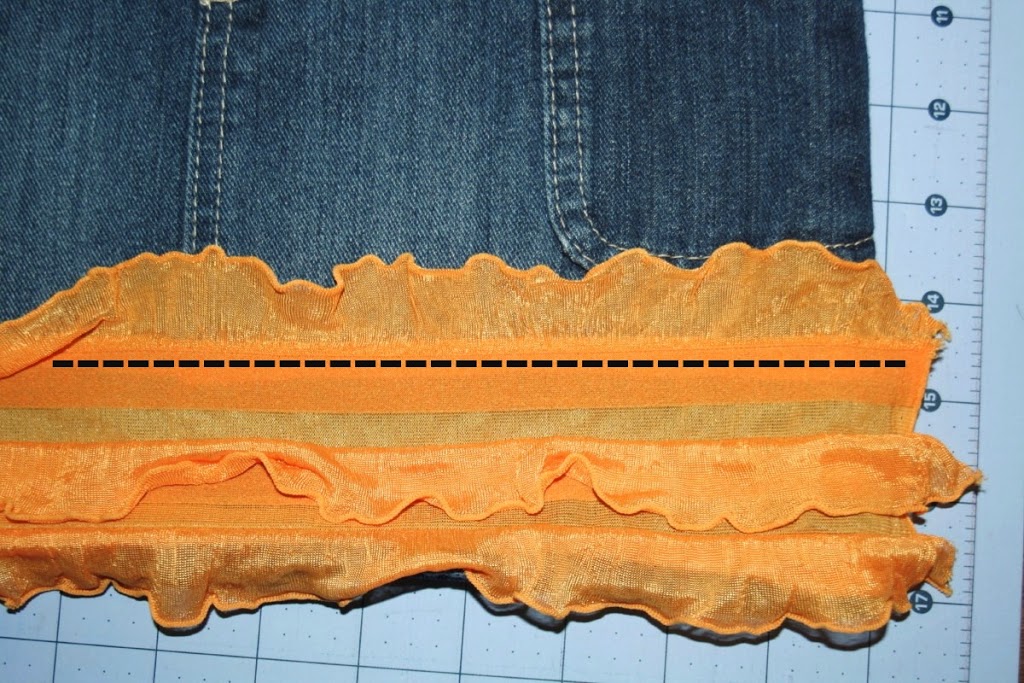
With a straight stitch for denim or other non-stretch material garments sew the material on along the dashed line. Sew all the way around until you reach the beginning and backstitch beginning and end:

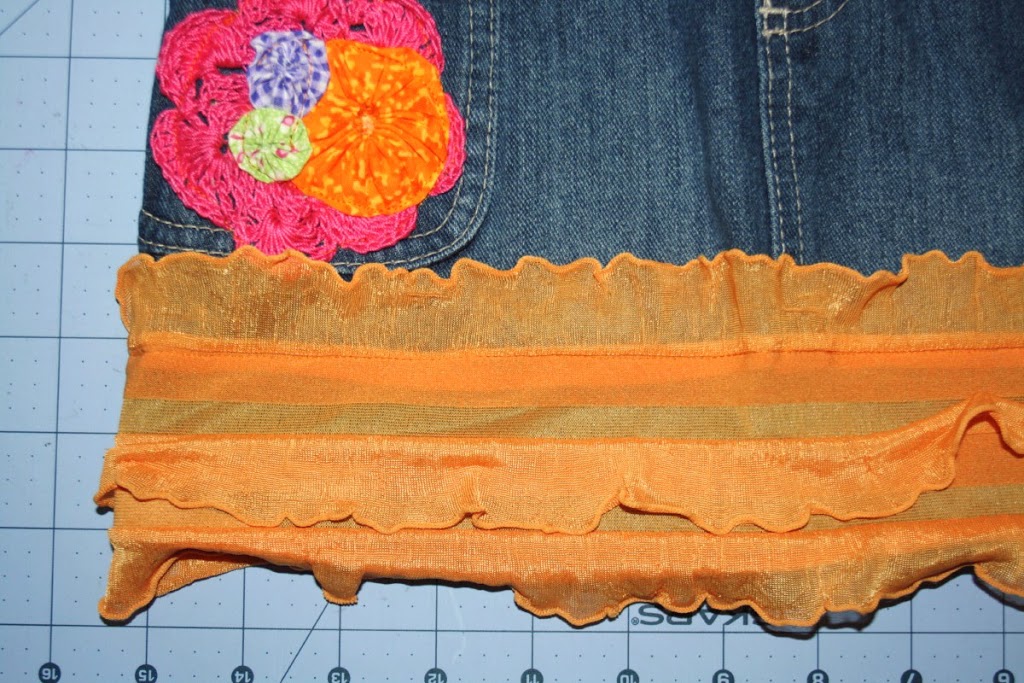
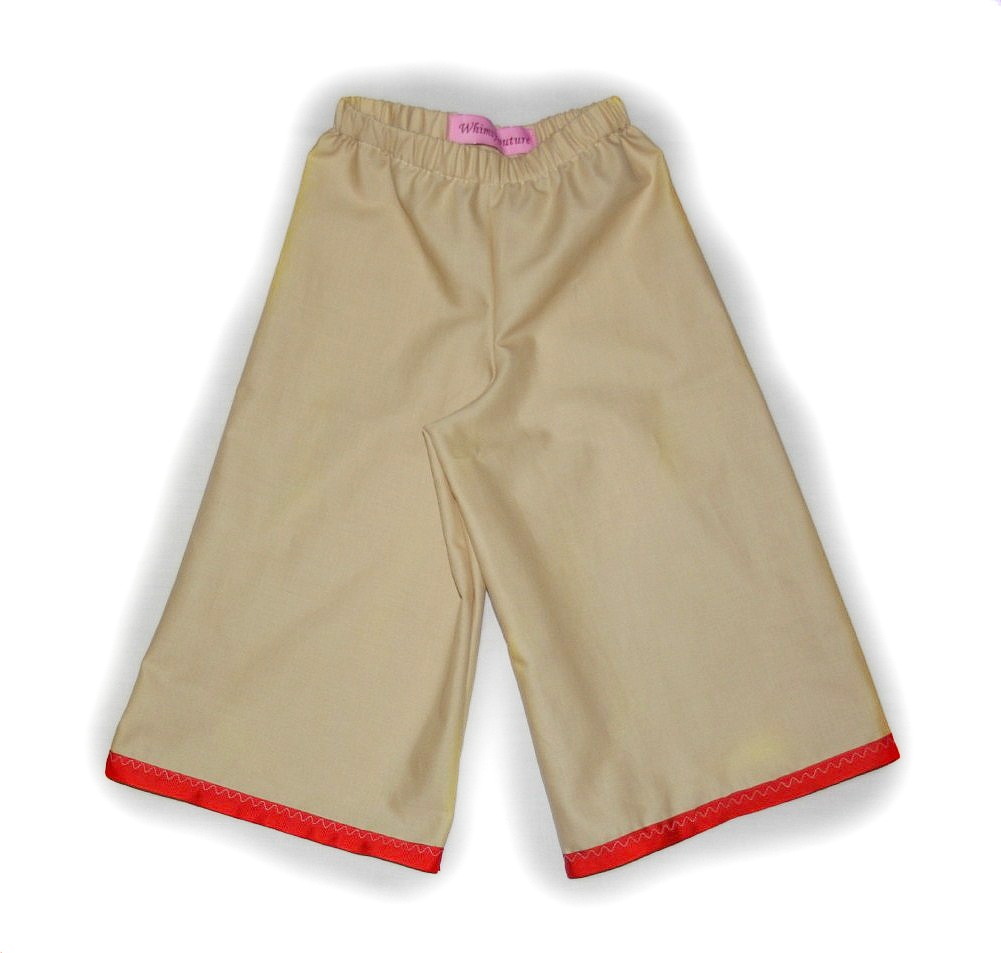
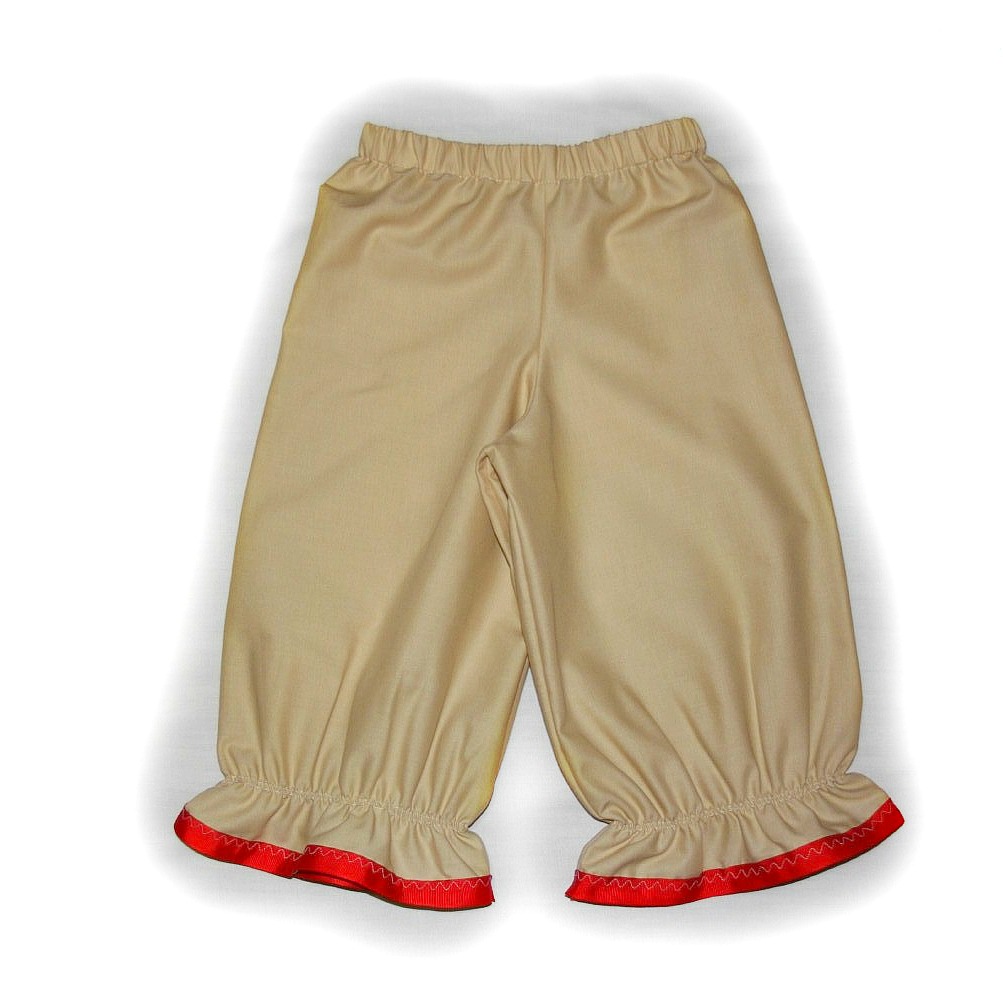
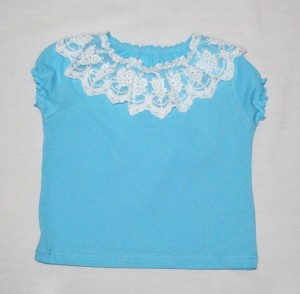
This is how it looks now:


Tuck the open edges under and top stitch:

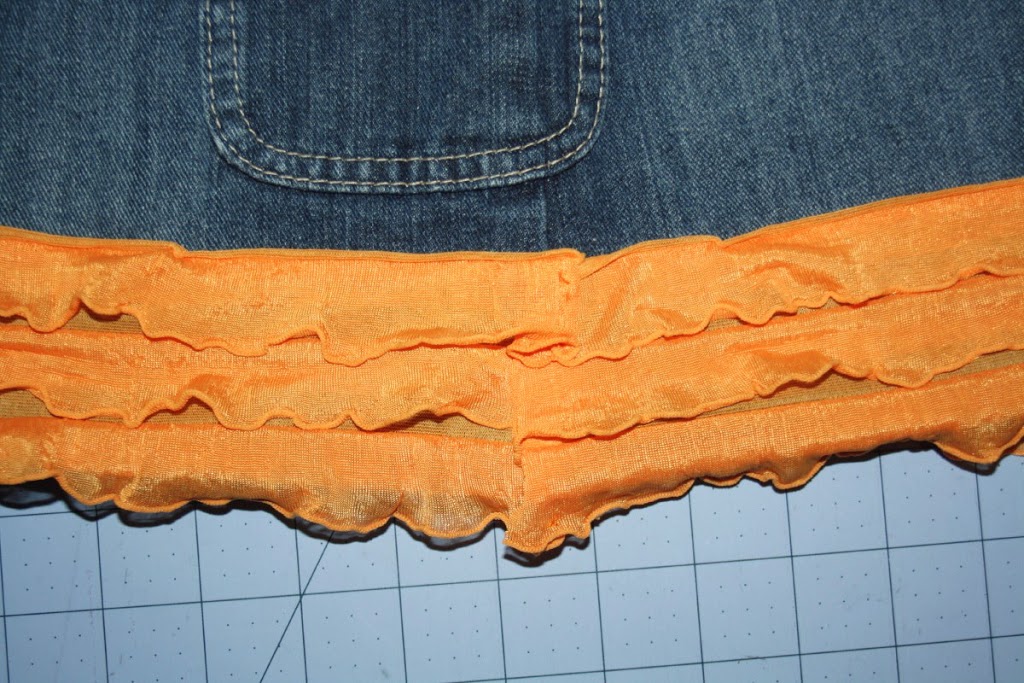
No way! You are done!

Now let me know how you like this Free Tutorial On How To Embellish !

Tutorial – Towel Redo With Added Ruffles

by 2 Comments


Today I want to share a quick tutorial for an old towel that becomes 2 ruffled guest towels:) I had this super soft but slightly stained towel:
I trimmed the best 2 pieces out of the towel:
To make the ruffle, I cut a 4″ wide strip of fabric, twice the length of my new towels small end. I folded it over with wrong sides together and pressed it:
To finish the sides I folded the edge in 1/4″ and once again 1/4″ and pressed it. Then I sewed it down (repeat with other side):
To ruffle my fabric strip I set my machine to the longest stitch and my tension to the highest number. This should automatically fabric. This is now my ruffled strip:
I finished my towels long sides by serging/zigzag stitching the edges, then folded them over 1/4″ and pressed them. Then I sewed them down:
It’s time to pin the ruffle to the slim end as shown:
I sewed the ruffle on with backstitching beginning and end. Then I serged the raw edge (you can also zigzag stitch it).
Then, last step, I top stitched my towel from the right side close to where the fabric meets the towel:
Repeat with other small end of towel, make 2, then you’re done!:)

What do you think?
Link

How To Make Pantaloons

by 4 Comments

I really love the vintage look and when it comes to pants (or capris) I love pantaloons, the puffy looking pants that are gathered around the ankle or calf.

This look is so easy to achieve with my RUFFLE PANTS (AND CAPRIS) SEWING PATTERN or any other straight cut pants pattern:)

I made the straight cut capris without ruffle.

Simply follow all the steps but without slimming down the inner legs. Leave them wide and once you have finished the pants, simply sew in some elastic 2 inches above the bottom hem, with elastic thread in your lower compartment!
Here are the capris with sewn in elastic:
For my khaki capri pantaloons I added some simple grosgrain ribbon to the bottom hem to make them match a top I made for my daughter using my APRON TWIRL PEASANT TOP/DRESS pattern. I made the top version minus the apron:)

Want to see more sewing patterns? Check out my PATTERN SHOP for instant download ebooks!

Free Sewing Tutorial – Beautify A Boxy T-Shirt With Lace

by 5 Comments

Free Sewing Tutorial


One of my favorite things to do is to recycle and upcycle clothing to make something useful out of them or beautify them as I did with this shirt.

I had this aqua t-shirt for my daughter but it was too boxy and not quite girly enough so something had to be done:)

boxyI had this beautiful remnant of delicate lace and gathered it along the top edge (ideally you want to have about twice the length of lace as the neckline is wide):

boxy
I cut my t-shirt’s neckline off:boxy


Pinned the lace to the front (if you have enough lace you could go all around):

boxy
I sewed the lace on with a slight zigzag stitch AND sewed elastic thread all around the neckline to give it some “peasant” style:


Not enough yet! I also cut off the sleeve edges:


And sewed elastic thread along the unfinished egdes. Unfinished edges are in right now:)
That’s my daughter’s t-shirt now!
 boxy


What’cha think?

Flower Headband Tutorial

by 1 Comment


Ready to make this cute flower headband?

Here’s how:
cut your fabric 1″ smaller than her head circumference and about 2-3″ in width. Cut a 2.5″ piece of elastic (1/4″ width):


Fasten a safety pin to the elastic and place it onto your fabric as shown:


Fold fabric over to cover elastic, let elastic peek out about 1/8″ on the side. Pin:

Pin entire fabric on side and long edge, leave the left side open. Sew with straight stitch and a seam allowance of 1/4″ beginning at right side, then follow along long side. Backstitch beginning and end:

This is now your sewn piece:


Turn headband with right sides out using the inserted safety pin to carefully pull the headband with the elastic through. Press. This should now be your headband:


Tuck raw side edges in as shown:

Insert open elastic end into tucked in side:

Pin:
Hand sew or machine stitch opening:


To make the flower:

Cut a long strip of fabric ( at least 20″ x 2.5″):

Finish one side with serger or use tight zigzag stitch:


Gather fabric strip:

Pull thread tight as shown:

Fold fabric into circle to form flower and stitch it onto the headband and add a button or similar decoration to hide center:

Your pretty flower headband is done! For free sewing and tutorials please my other website at DIY Crush!

2 Free Shamrock Appliques For St.Patrick’s Day & Let’s Sew Craft Linky

by Leave a Comment


St.Patrick’s Day is approaching just to fast and I am posting these 2 shapes for you to use!

Feel free to download them and get crafting, coloring etc.!

Click HERE to download them!

~~~~~~~~~~~~~~~~~~~~~~~~~~~~~~~~~

Welcome to a new craft linky on Wednesday!

Spread the word and please put this button onto your blog to get more people to show off what they made every Wednesday.

Whimsy Couture

Here’s how it works:

  • follow my blog (via google direct or email subscription)
  • family friendly crafts only!
  • please put my Let’s Sew button onto your blog
  • list ANY crafts you made, no matter what and no matter how many!
  • enjoy by browsing all the links that you like!

Have fun!:)

New Pattern Release – Peekaboo Pet Bed

by Leave a Comment


SEWING PATTERN for making a PEEKABOO BED:
~
You will receive: ONE (1) sewing pattern with pictured tutorial to make 2 different sized beds. This bed is perfect for cats and small dogs! It’s reversible to you can use both sides! Make one summer and one winter side! So fluffy and comfy! I promise your pet won’t want to leave this one!
~
This pattern includes:
-step by step instructions with colored pictures
-2 sizes (for one cat/teacup dog) and (up to 3 cats/small dog/dogs)
-paper cutout for rounded corners
-pattern comes on PDF files!
~
The bed shown in the picture is only an example of what you can make with your own fabric and my sewing pattern! Bed is NOT included! Nor is the fabric.
~
It’s so easy to make your own!
~
You will need: fabric, a sewing machine, notions, scissors, measuring tape or lip edge ruler and basic sewing skills
~
Check out my other patterns!
~
SEWING PATTERNS/TUTORIALS CANNOT BE RETURNED OR REFUNDED!

Purchase it securely through paypal from my PATTERN SHOP! through INSTANT DOWNLOAD (you will be directed to your download link once you pay) for a low intro price of $4.50.

Free Fabric Flower Tutorial

by 7 Comments

An adorable flower, anyone? Make these easy to do fabric flowers to add to headbands, dresses, tote bags and just about anywhere you’d like!
Download your free tutorial HERE!


An Interview With Mark Cesarik & A Giveaway! NOW CLOSED!

by 86 Comments


I am very excited to present a new star on the fabric designer horizon! Mark Cesarik!

Mark just launched his first collection produced through Free Spirit and let me tell you, it’s fantastic! I posted about it HERE.

Not only can I present you this awesome line but I was lucky enough to have Mark do an interview with me and offered a treat to my readers:

1)where were you born and raised?
Born in Buffalo, New York and raised just outside of Cleveland, Ohio.

2)how did you get started designing fabric?
My first time designing fabrics came when my girlfriend (now fiance), an avid crafter and sewer, asked me to design a fabric for a pattern she was making. She had just heard of a company called spoonflower where you can design your own fabrics by the yard and this really gave us a chance to actually design our own fabrics. This was in 2007, and that, along with the fact that we had just gotten a perfect little puppy named Bettie, led to us forming Sew Bettie in late 2007.

3)what inspires you?
Wow, that’s a loaded question and I hope it doesn’t sound like I’m giving you a generic answer when I say everything. My background is in painting, drawing and design, so I suppose that, as a fine artist I’ve always just kind of taken things from everywhere; some of my favorite artists, my physical environment, whether natural or man-made, my emotions that I’m feeling at the time. I have been a city-dweller for my entire adult life so the modern urban environment has always had a profound effect on my instincts as an artist and designer as well.

4)how long did it take you from the first thought of a design to the actual finished fabric line?
That’s a tough question as well. Most of my direct visual references come from my sketchbook, and it depends on where that reference has come from, when I first made it, etc. But I’d say that after I have a good jumping off point a collection can take me anywhere from 2-to-6 weeks … although maybe more … or less. Ha. Calypso Swing was my first full, cohesive collection. With Sew Bettie I always was designing individual fabrics and wasn’t thinking so much of quilting as I was finished products and accessories. Designing as a complete collection is a different animal in its entirety, obviously, as you have to think beyond what you are working on at the moment and how that fits as a part of a group.

5)who are your fabric designer idols?
As a relative outsider to the quilting/crafting world I’d be lying if I said that I had a ton of fabric designer “idols” so to speak, but I really find myself drawn to designers such as Amy Butler, Heather Baily and Anna Marie Horner. What these women design transcend more than just quilting or crafting, I really think a lot of their designs translate very very well to all areas of surface design.

6)do you have assistants or do you design by yourself?
Sometimes I ask my “assistant” (my fiance Cara) for color suggestions. It’s kind of funny sometimes when I am stuck in a rut I’ll look up and say “Ummm …. yeah why don’t you come on over and try out some color options. See you in 30 minutes.” Other than that its just me.

7)what makes your collection stand out from others?
I would say that my relative “outsider” status is evident in my first collection. It has an edge to it that might be a little harder to find in this industry.

8)when will we see some of your wonderful animal designs on fabric?
I love incorporating animals into my fabric, in particular dogs, I designed quite a few pooch fabrics under the Sew Bettie Label, but for my first Free Spirit collection I wanted to go in a different direction. I have a feeling that you might see some furry animal references in the near future.

9)where would like to see your fabric being used for?
Everything! Quilts, clothes, accessories. I love all elements of surface design and hope to design just about everything that I can.

10)lastly, do you have any advice for the newbie fabric designer and those who want to be one?
My main advice to anyone doing anything creative, weather that’s designing fabrics or oil painting, is to stay committed to the work. The work is the most important thing, That’s what artists live for, to enjoy and struggle with the process and to see it to it’s completion. Outside of that the main thing is getting your name out there. In this industry I love the entrepreneurship that is required of anyone who hopes to make a career out of it. Cara and I have put a lot of effort getting Sew Bettie off the ground and obviously almost 4 years later my first fabric collection from Free Spirit is coming out. It’s certainly been a process.

Thank you Mark, for this great interview! It was a pleasure to have you here! Good luck with your fabric designs!

Now to the treat I promised! Mark has generously offered to do a giveaway on Whimsy Couture and I am so excited to this! NOW CLOSED!!

Mark is giving away 1 yard of his collection Calypso Swing:

and 1 yard of Rythmic Toss:


For some great inspiration visit Mark Cesarik’s Website.

How to enter: NOW CLOSED!!

All 3 entries are mandatory!

  • visit Free Spirit and name your favorite print from the Calypso line!
  • follow Mark Cesarik’s Blog
  • subscribe to Whimsy Couture Blog via email (pink box on top right)

Open worldwide – open until Feb.7, 2011 NOW CLOSED!!

How To Make Almost Any Hood Wind Tight – Free Tutorial

by 1 Comment

Did you notice that some winter coats for kids have a wide open hood? It’s easy for wind to get in. Here is a quick tutorial I just finished that shows you how easily you can add elastic to almost any hood!

Click HERE to download it!

If you like this tutorial I would be delighted to read a comment from you!

Would you like more sewing tips? Then please sign up for the blog updates which you’ll find on the right sidebar!

Free Applique Templates For Christmas & Let’s Sew Craft Linky

by 3 Comments


I love sharing something cute so today feel free to download two Christmas templates for your applique work!

Use them to embellish shirts, dresses, tote bags, pillows etc. with! For your personal use only! Please don’t sell the templates!


Click HERE to download them!

~

Don’t forget to vote for your favorite Whimsy model! Scroll down a couple of posts to view our 3 beautiful models!

I am sorry for the slight delay! Normally Let’s Sew is offered Wednesday but I hope you’re still going to show off what you made!

Spread the word and please put this button onto your blog!

Come and show off your creations every Wednesday!

Whimsy Couture

Here’s how it works:

  • follow my blog (via google direct or email subscription)
  • family friendly crafts only!
  • please put my Let’s Sew button onto your blog
  • list ANY crafts you made, no matter what and no matter how many!
  • enjoy by browsing all the links that you like!

Have fun!:)

Knit/Fleece Beanie Hats Sewing Pattern

by Leave a Comment

Plushies (Scottie Dog & Kitty) Sewing Pattern

by Leave a Comment

plushies sewing pattern collage

Sew up some cuteness for hugging or for decoration!! A scottie dog and a folk art kitty are ready to go to new homes but first, you have to make them!:)This pattern contains:

-PDF files with tutorial and shape for dog and cat

You will need: fabric, fiberfill, sewing machine, buttons, ribbon

They both measure about 10×14″

Click HERE!

Fleece Mittens Sewing Pattern

by Leave a Comment

NEW SEWING PATTERN for making easy fleece mittens for sizes 12m – age 10. Fits for boys and girls.

Add a cute ruffle for the girly version and some felt flowers!This tutorial contains:

-pdf files with templates to cut out your desired size from XS through L

-tutorial with step by step instructions and lots of pictures

~ You will need: fleece, a sewing machine, thread, scissors, 1/4″ elastic, decorative trim optional, and basic to advanced sewing skills

~ SEWING PATTERNS/TUTORIALS CANNOT BE RETURNED OR REFUNDED!

Click HERE!

Giveaway – Ruffle Scarf Tutorial Plus 2 More NOW CLOSED!!!

by 88 Comments


NOW CLOSED!!!!!!!!!!!!!

This giveaway is for an e-pattern to make Whimsy Couture’s newest design…….a ruffle scarf for girls and ladies made from fleece! Plus 2 more!

That means you can choose the other two!

Whimsy Couture’s workshop is very busy to bring you lots of new patterns in the next few weeks!

This scarf is so dreamy and warm with its two sides and you can even make it for boys and men without the ruffles! The tutorial offers 2 lengths for kids and adults. Here’s how to enter:

  • tell me a cute reason why you want to win this tutorial plus two others (a total of 3 ebooks)
  • browse my etsy shop and name your favorite (other) tutorial
  • follow this blog via google friend connect
  • follow us via email subscription (activate please!)
  • follow us via facebook
  • blog about this giveaway (3 extra entries!!!)
  • post this giveaway on your facebook page (2 extra entries!!)
  • place Whimsy Couture’s button from the side bar visibly onto your blog

That’s 12 chances to enter with separate comments! Open worldwide! Open until Dec.16, 2010 NOW CLOSED!!!!!!!!

For those of you who can’t wait to win, go to my ETSY SHOP to find the ruffle scarf tutorial!

  • « Go to Previous Page
  • Page 1
  • Interim pages omitted …
  • Page 9
  • Page 10
  • Page 11
  • Page 12
  • Page 13
  • Go to Next Page »

Primary Sidebar

Affiliates & Sponsors (see our disclosure policy in the top menu)

Follow Whimsy Couture

  • Facebook
  • Instagram
  • Pinterest
  • Twitter

Search For A Blog Post

Search For A Pattern

Product Categories

  • Boys Sewing Patterns
  • Girls Dress Sewing Patterns
  • Girls Jacket Sewing Patterns
  • Girls Pants & Skirts Sewing Patterns
  • Girls Romper Sewing Patterns
  • Kids Hats & Scarves Sewing Patterns
  • Ladies Sewing Patterns
  • Miscellaneous Sewing Patterns
  • Patterns
  • Pet Bed Sewing Patterns
  • Uncategorized
  • Home
  • Shop
    • Tops & Dresses
    • Pants & Skirts
    • Capes & Jackets
    • Rompers & Overalls
    • Ladies Sewing Patterns
    • Boys Sewing Patterns
    • Hats & Scarves
    • Miscellaneous Sewing Patterns
    • Pet Bed Sewing Patterns
  • My Account
    • Checkout
    • Cart
    • Logout
  • Affiliate Area
    • Info About The Affiliate Program
  • Blog
    • Whimsy Couture
      • Free Tutorials
      • Free Patterns
      • Pattern Sales
      • Giveaways
      • Pattern Shop
      • Reviews
      • Software for PDF patterns
    • DIY Crush Free Patterns & Tutorials
  • About
  • FAQ
  • Contact
  • Disclosure Policy

© 2025 · Elise Genesis WordPress Theme · by One Happy Studio

This website uses cookies to improve your experience. We'll assume you're ok with this, but you can opt-out if you wish.Accept Read More
Privacy & Cookies Policy

Privacy Overview

This website uses cookies to improve your experience while you navigate through the website. Out of these, the cookies that are categorized as necessary are stored on your browser as they are essential for the working of basic functionalities of the website. We also use third-party cookies that help us analyze and understand how you use this website. These cookies will be stored in your browser only with your consent. You also have the option to opt-out of these cookies. But opting out of some of these cookies may affect your browsing experience.
Necessary
Always Enabled
Necessary cookies are absolutely essential for the website to function properly. This category only includes cookies that ensures basic functionalities and security features of the website. These cookies do not store any personal information.
Non-necessary
Any cookies that may not be particularly necessary for the website to function and is used specifically to collect user personal data via analytics, ads, other embedded contents are termed as non-necessary cookies. It is mandatory to procure user consent prior to running these cookies on your website.
SAVE & ACCEPT