Free Photo Editing Services

Perhaps you know by now that the awesome free picture editing service picnik.com is going over to Google+ with some of their strongest tools. I don’t think it will be the same:(

I will miss picnik very much as I use it often and got used to the easy and fun options to bring life and professionalism into my pictures (at least I think they looked more professional {smiley face}).

 picture edited with befunky!

Here are some free alternatives for editing:
befunky
getpaint
picasa
gimp
photobucket
pizap
photoscape
lunapic
fotoflexer
iPiccy
FotoFuze
PicMonkey  
Adobe Spark

How To Clean Your Sewing Machine

Cleaning your sewing equipment is essential for sewing smooth but also for making your machine last!
Does your lower compartment on your sewing machine look like this?
 
How To Clean Your Sewing Machine

Then it’s time to get cleaning!!

 
I use canned air (available at Office Depot, fabric/craft stores, Target etc.). Then I use my vaccum cleaner hose and while I hold the hose to the bobbin compartment I gently spray air with the long “straw” of the air can towards the vacuum hose. That way I am not getting dust all over!:)
 
How To Clean Your Sewing Machine
 
If your compartment now looks like this:
 
How To Clean Your Sewing Machine
You’re all set and your machine will continue to last!
 
Share your cleaning tips in a comment below this post!


Free Chloe Dress Pattern By Dawn

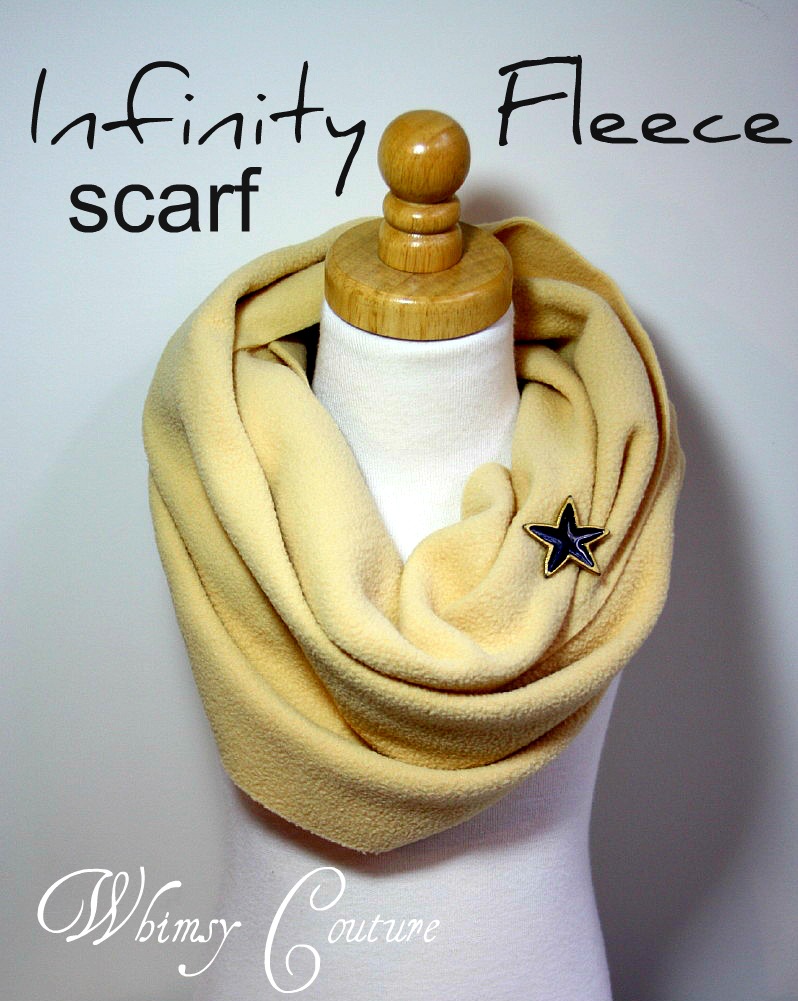
Hi everyone! Today I have a super special treat for you all! This is my very first guest post with a terrific tutorial! Please welcome Dawn!
 
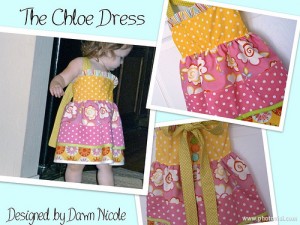
Hi!  I’m Dawn and I blog over at Designed by Dawn Nicole.  I’m an Air Force wife and momma of a 3 1/2 and 2 year old with our third (and final) due in March.  I started sewing a few years ago as a way to fill my time in the small town we’re currently stationed in and I’ve fallen so in love with it (sewing, that is, not the small town!).  When Denise emailed me about guest posting here at the Whimsy Couture Blog, I seriously about fell out of my chair.  Her patterns were among the first I used when I began sewing and I’ve been a fan for a while now.  I’m so honored to be here and today I’m sharing this tutorial for The Chloe Dress.
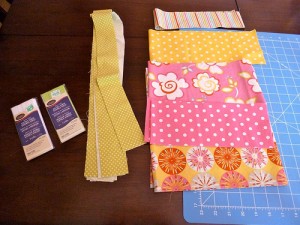

The Chloe Dress Main


What You’ll Need:
 
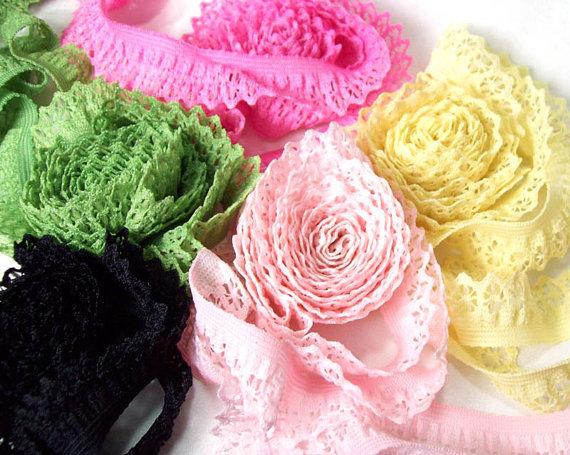
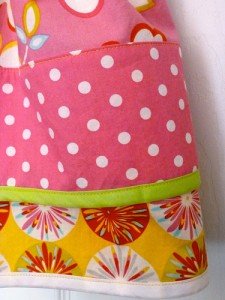
-Fabrics of your choice (I bought a half yard bundle of 5 coordinating fabrics)
-2 packages of double fold bias tape (I used two different colors)
-Three 1″ Buttons
-1/8″ elastic (You’ll need three 2″ pieces)
-All Your Sewing Goodies
 
Let’s get into the measurements.  I promise it’s easier than it sounds.  You’re basically just cutting out a bunch of rectangles.  The ruffle ratio for this dress is 2:1.  We’ll be ruffling the top piece on the bodice and the skirts.  
The straps and strap loops will stay the same for most any size:
Straps: Cut four 2″x36″ pieces
Strap Loops: Cut one 3″x9″ piece (we’ll cut it in half later to form two loops)
 
This dress is based on two basic measurements.  You’ll need to measure your model’s chest (right under the armpits) and her length from armpit to knee.
My daughter’s measurements were 21″ for the chest and 14″ in length from chest to knee.  She typically wears a 2T.  I’ll give you the break down for the additional pieces you’ll need for the 2T and then show you how to adjust this to any size.
 
Bodice piece: Cut one 22″x4″ piece
Ruffle piece: Cut one 44″x2″ piece
Bottom Layer of Skirt: Cut one 44″x11″ piece
Top Layer of Skirt: Cut one 44″x4″ piece and one 44″x5″ piece
 
This makes my overall length of the dress 15″ before taking about about an inch in seam allowances.
 
To size this to your model:
 
Bodice Piece: Take your model’s chest measurement + 1″.  Your rectangle needs to be that number x 4″.  So for my daughter, I took 21″+1″ to get 22″, so my bodice piece is 22″x4″.
 
Ruffle Piece: Take your model’s chest measurement + 1″ and multiply by 2.  Cut this length x 2″.  So for my daughter, I took 21″+1″ to get 22″ and multiplied by 2 to get 44″ (44″ is your “ruffle ratio number”).  So my ruffle piece is 44″x2″.
 
Skirt Bottom Layer:  Use your ruffle ratio number (44″ for me) as the long side of the rectangle.  To get the width, take your model’s chest to knee measurement and subtract 3 inches.  So for my daughter, I took 3″ off her 14″ length measurement, I got 11″.  So I cut my rectangle to be 44″x11″.
 
Skirt Top Layer: Again, take your ruffle ratio number as your long side of your rectangle.  You want the total of these two rectangles to be 2″ shorter than you skirt’s bottom layer.  Since that made my top layer 9″ in length, I made one rectangle 44″x4″ and one 44×5″. 


Whew!  Are you still with me?  The math part is over!  Let’s get to the fun part: sewing!


P1010348


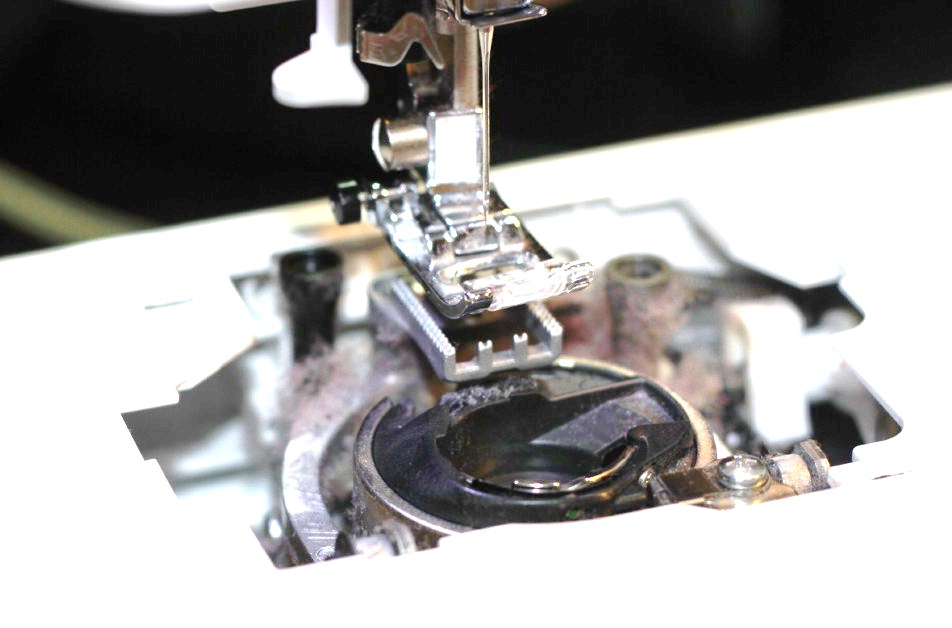
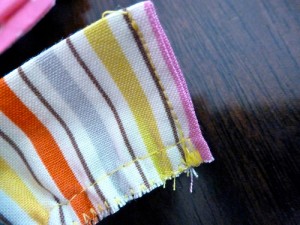
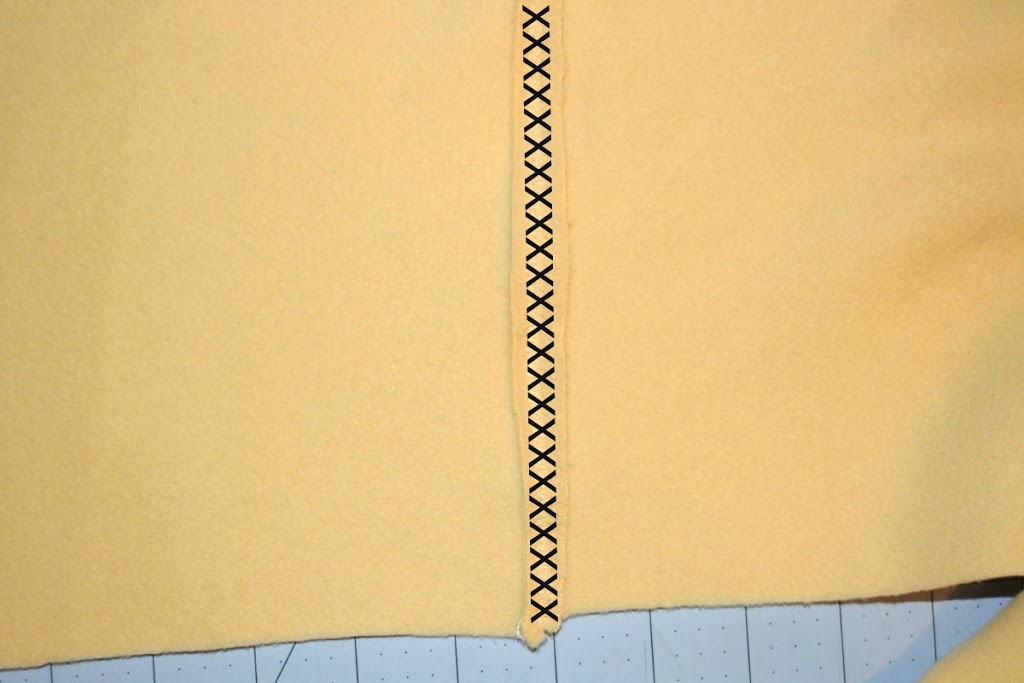
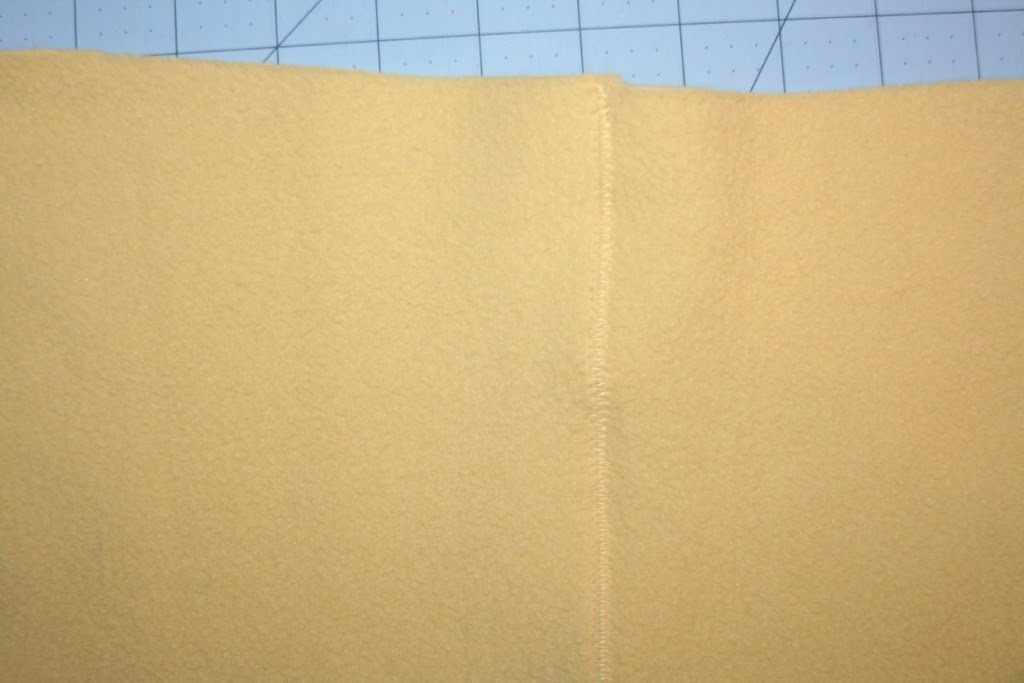
Unless otherwise noted, use a 1/4″ seam.  Finish all raw seams with a serger or zigzag stitch.  
 
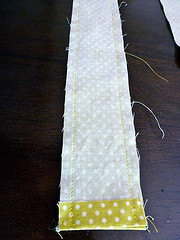
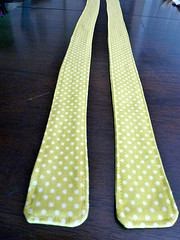
We’ll start with the straps.  Iron the ends of each strap over about 1/4″ as seen in pic below.  Pin two of your strap pieces right sides together.  Sew with a 1/4″ seam leaving one end open for turning.  Clip the corners.  Turn strap right side out and press seams.  Topstitch using a 1/8″ seam all the way around.  (This will close up that open end).  Repeat for other strap.


P1010355 P1010357
 
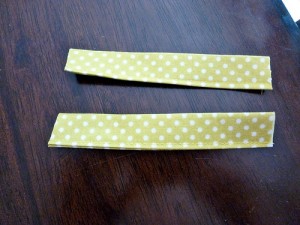
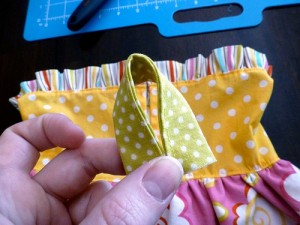
Now take your strap loop piece.  Iron in half length wise.  Open it up and iron each side towards the center fold you just created.  Then fold in half lengthwise again and iron.  (Pretty much like you’re creating a piece of double fold bias tape).  Sew together with a 1/8″ seam and then cut in half so you have two pieces, as shown below.


P1010385
 
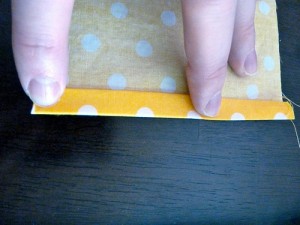
Set all strap pieces aside for later use.  Take your bodice piece and fold the short end under 1/4″ and iron.  Fold over another 1/4″ and iron again.  Sew and repeat for other end.
 
P1010359
 
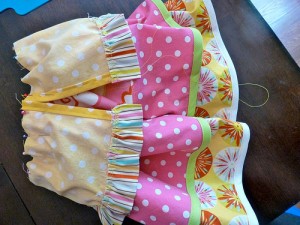
Now your bodice piece looks like this:
 
P1010360
 
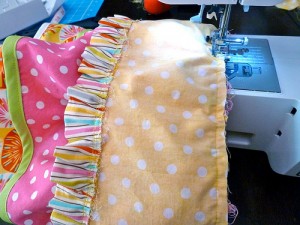
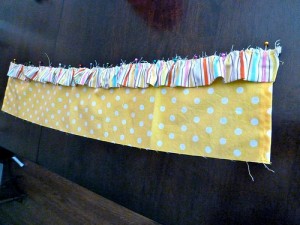
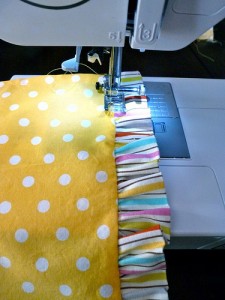
Set aside while we make the top ruffle.  Fold end short ends of the ruffle piece under 1/4″.  Then fold the entire piece in half length wise with wrong side together and iron again.  Sew the short ends closed.  (I’ve already ruffled and zig zagged in the below pic).


P1010354
 
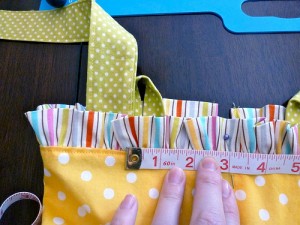
You can use a ruffling or shirring foot to ruffle along the raw edge or you can set your stitch length to 5.0 and baste a 1/8″ seam.  Do not backstitch.  Pull along thread tails to ruffle by hand.  Ruffle until the piece is the same length as the top edge of your bodice piece.  Pin ruffle generously to top right side of bodice as shown below.
 
P1010362
 
Sew ruffle to bodice with a 1/4″ seam.  Flip ruffle up up and iron.  Topstitch with a 1/8″ seam.


P1010363


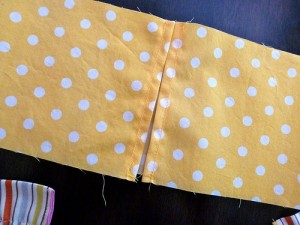
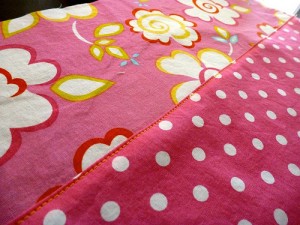
We’re done with the bodice for the moment.  Now take the two pieces of the top layer of your skirt and pin with right sides together along one long side.  Sew.  Open, iron seam, and topstitch with a 1/8″ seam.


P1010370


P1010372


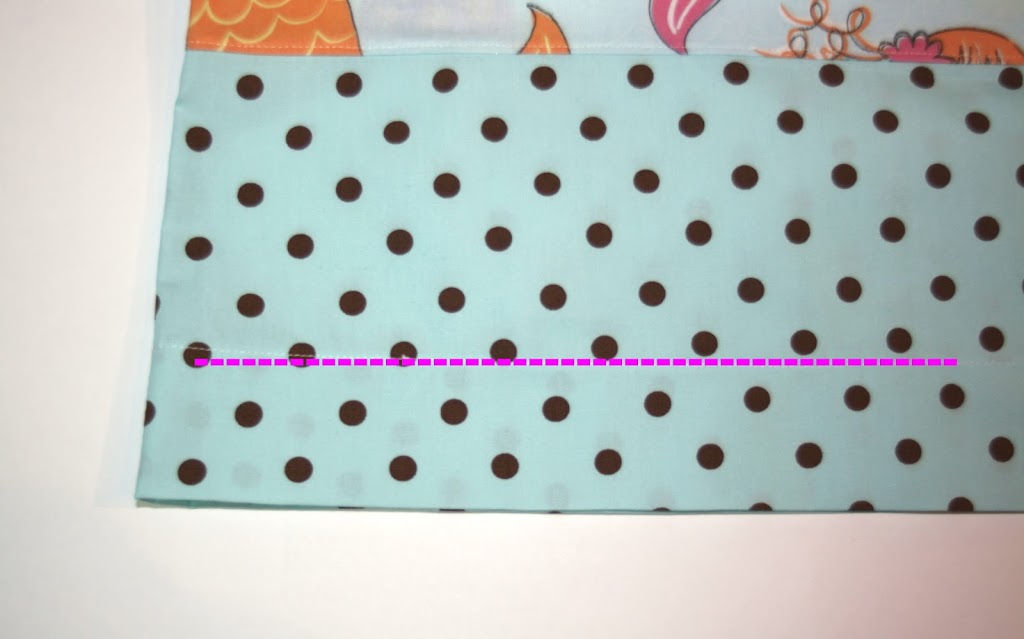
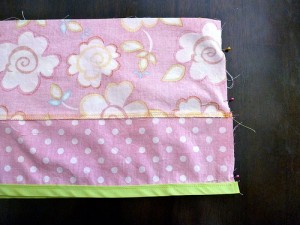
Now take one of your bias tape colors and pin it along the bottom edge of this skirt piece.  Sew as close to the edge of the bias tape as you can, ensuring you catch both sides of the bias tape.
 
P1010374


Pin short sides of this skirt piece with right sides together and sew.  Invert, iron the seam and you’ll have a tube.
 
P1010375


P1010377


In the same manner, add the other color of bias tape to the bottom edge of the bottom layer of the skirt.  Again, pin the short sides of the skirt piece with right sides together and sew.  Invert, iron the seam and you’ll have another tube.
 
P1010378


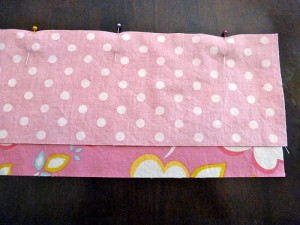
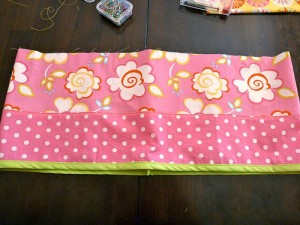
With rides side out, put the bottom layer inside the top layer of the skirt.  Pin together and ruffle the top edge of the skirt piece.  Ruffle until the skirt is the same size as the bodice piece.


P1010379


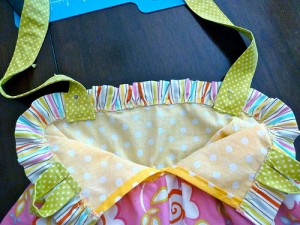
Now we’re going to attach the bodice to the skirt.  Pin the bodice to the skirt with wrong sides together as seen below.  You can put your skirt seams on the side of the dress or in middle of the back.  I choose the back since the bodice already has an opening in the same place.  Pin as if there wasn’t a break in the bodice.  Sew the bodice and skirt pieces together.

 
P1010381


P1010382


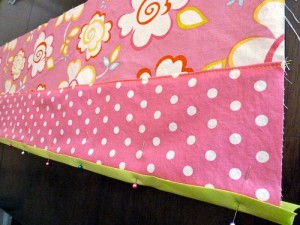
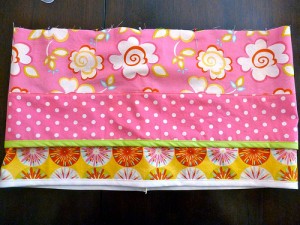
Flip the bodice up, iron the seam, and topstitch with a 1/8″ seam.
 
P1010383
 
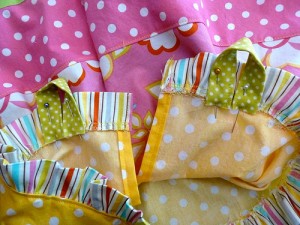
Now we’ll add the straps.  Fold each strap loop as shown below and pin inside back of dress.  I pinned each strap loop about 1 1/2″ out to each side of the center of the back.  Sew in place.


P1010386


P1010387
 
Now pin the front straps inside the dress about 3″ out from the center of the front of the dress and sew in place.
P1010389
 
 
P1010390
 
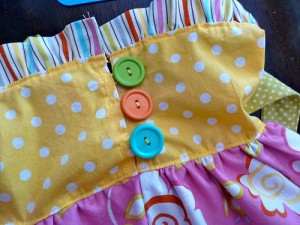
Almost done! Sew three buttons along one side of the back opening.  I opted to hand-sew these.  On the other side.  Pin in your elastic pieces in a similar fashion to how we did the back strap loops and sew in place.  I stitch over this a few times since it’ll be getting pulled on.


P1010391


P1010392
 
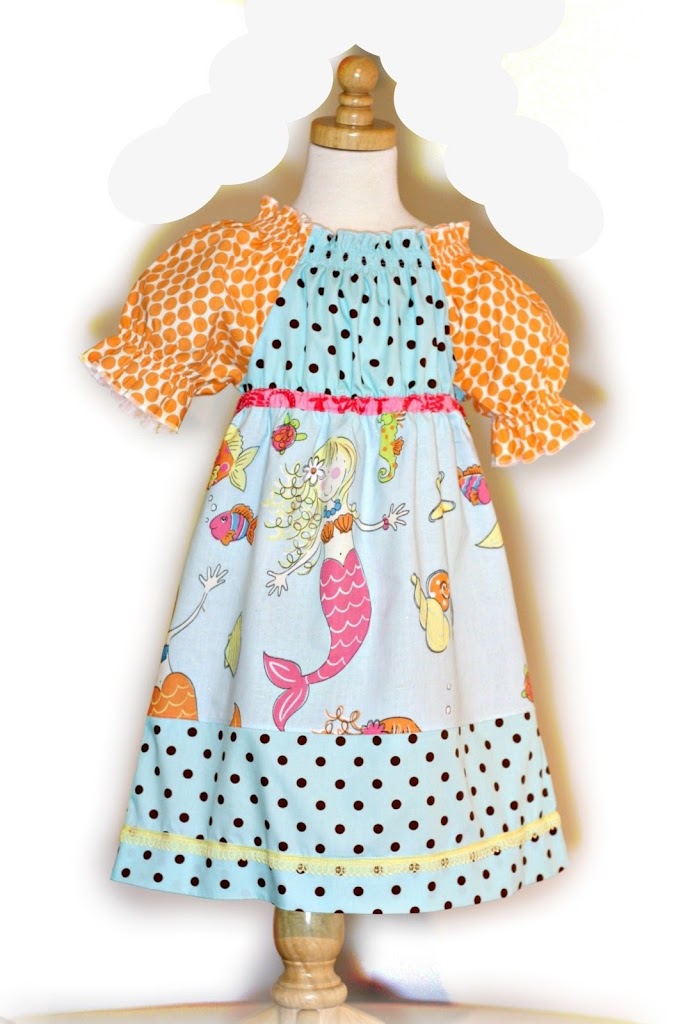
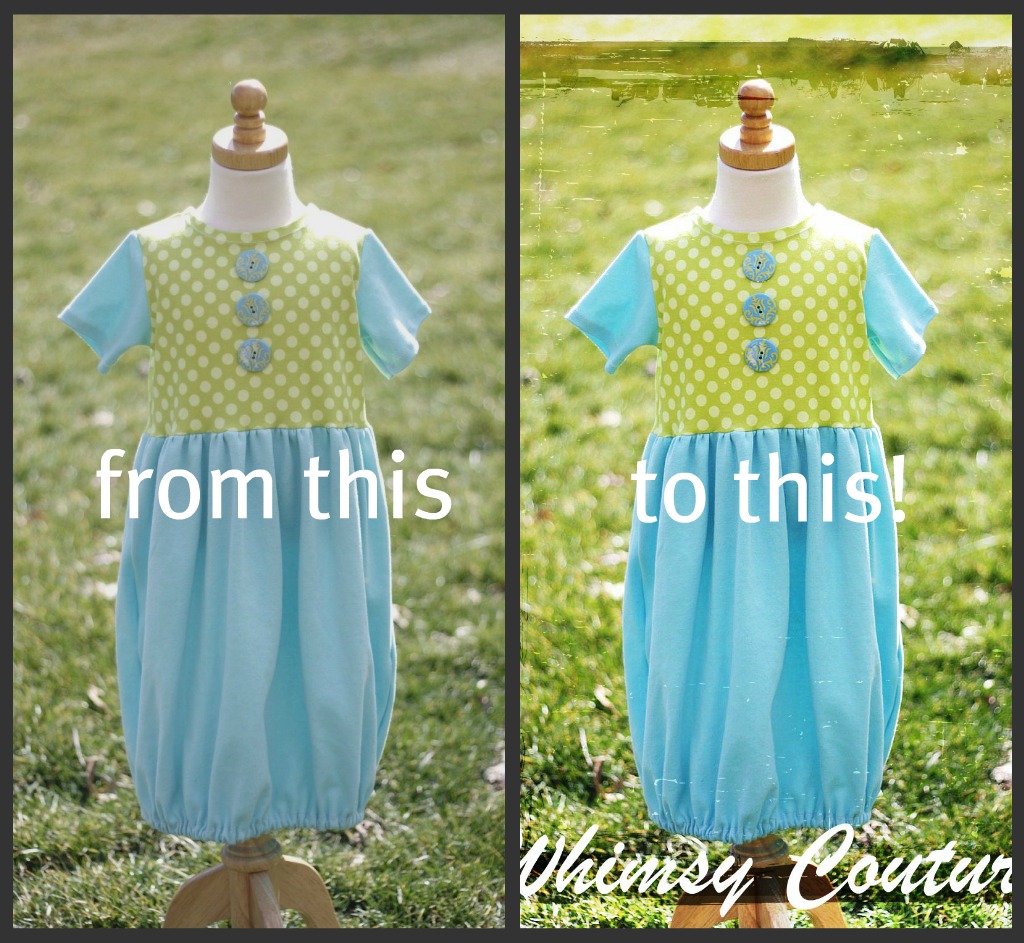
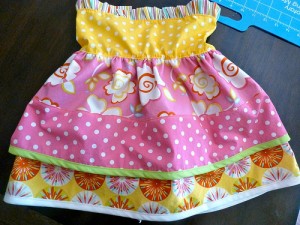
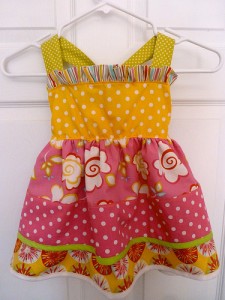
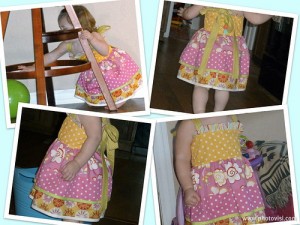
This style back closure will allow it to grow with your daughter.  When I made this last summer, it fit my daughter more like a dress and when I tried it on today, it fit a bit more tunic-like but still has plenty of room in the chest area and paired up super cute with a pair of capri length leggings.  Thread straps through the back strap loops, tie in a bow, and we’re done!!
 
P1010401
 
 
P1010396
 
 
The Chloe Dress Modeled


Thank you so much for having me today!  If you have questions about any of the above, please don’t hesitate to contact me via any method listed on my blog’s contact page and I’ll be more than happy to help.
 

Wow! That is a great tutorial, guys!! {Denise}


Free Valentine’s Day Applique Shapes


This set of applique shapes are from last year but I thought you might like to know about it!:)


For some fun Valentines crafts or sewing projects I have added some shapes for free download last year! For this post I made examples from the shapes. Use them for appliques or hand embroidery or even as coloring pages!


The download contains the following Valentines shapes:

  • Cupid
  • 2 hearts
  • the letters “Love”

Click THIS to download the shapes!

If you download it I would love to read a comment from you;)
Happy crafting!


Pin It

Free Infinity Fleece Scarf Tutorial


Free infinity fleece scarf tutorial

Check out our super fast and free sewing tutorial to make an Infinity Fleece Scarf!

Don’t you just love fleece and all its possibilities? I love everything about it, the softness, the ease when washing, how well it sews and that you don’t have to hem it if you don’t want!

Today I want to share this quick and easy tutorial for making this scarf.

You only need a piece of fleece that measures about 12×60″ (most fleece fabrics measure about 60″ wide)
Fold both small ends with either side together:

Sew along dashed line with a seam allowance of 3/8″ and backstitch beginning and end:

This is how your seam looks like now. Place scarf in front of you with raw seams facing you:

Zigzag stitch right over the center seam with a really wide stitch. Backstitch beginning and end with a regular straight stitch:

This is how it looks from the other side now:

And you are DONE!

Add a pretty button for some visual interest and enjoy it!

If you like to see more free tutorial, please click the TUTORIAL tab underneath my banner on top!

For more fleece sewing patterns please visit my Pattern Website and type in “fleece” to see all of them!

Find many FREE sewing patterns & tutorial at my other website DIY Crush!


Review And Tutorial To Paint A Curvy Frame


Curvy frames seem to pop up everywhere lately! Have you seen them before? They are fun and really add beauty to any room decor! Professional photographers use them to present their artwork in and lately I see unfinished ones such as the ones I got from zz bob’s. Bob and Pam are a couple that love cutting out unique shapes from MDF and so were their curvy frames made.

I ordered some for myself and got some as a freebie for doing this review. I was pleasantly surprised by how fast the package arrived and how well the frames were made! They have very smooth (I mean VERY smooth!) edges and even the back where the picture space is was nicely finished.

Okay, off to my review project:
I wanted to do a fun thing with chalkboard paint and I chose this shape of frame:

First, I gave it a coat of primer:

I let it dry overnight (you don’t have to but I did this project in several steps)

Then I used Valspar chalkboard paint (available at Home Depot or Lowe’s):

With a soft paint brush I painted one coat on and let it dry (overnight). I made sure to paint the inside and outside of the depth as well:

It got another coat and then it showed optimal coverage:

From a Dollar Store frame in 4×6″ I took the glass and inserted it into my curvy frame….

…….then with chalk I wrote my little one’s name and some hearts to show off just how much I love her!
A BIG thank-you to ZZ Bob’s shop for the review items!! I’ll have more to show off soon for ya!

NOW CLOSED!!! Giveaway – Personalized Business Revamp Package

NOW CLOSED!!!!

Do you have an etsy boutique that can’t quite get the sales you want? Is your shop open since months without a significant amount of sales? Then this is your giveaway! Only valid for etsy shops that are older than 3 months and haven’t gotten many sales yet!!!

As some of you may know, I have worked with many online businesses to help them increase their sales and get the word out to the internet shoppers. My degree in business management concentrates all around a home based business.

This is your chance to get an entirely new strategy to market your business!
You’ll get my honest opinion about your etsy store listings and everything that comes with it. I’ll take a close look at your descriptions, titles, pictures, tags and your banner. I’ll give you a brutally honest point of view of what to change, add or do differently. There are many etsy success kit sellers out there charge good money for their services. This giveaway will be containing it all!

You’ll receive my documents (written by me) of tips/tricks on how to do your own marketing and increase your sales. It contains many active blog links on which to either place paid advertisements or to contact for having a review or giveaway posted.

You will get a list of web browsers where to register your shop at! Further you will get info on what social media will work best. You will get sites to list your business at for FREE!

You will have the chance to discuss YOUR financial situation with me to pin point what expenses are needed to make this work and which ones are not. All my tips will be concerning a very limited budget. You won’t need much to get your business started.

I’ll be in direct contact with you via email and will answer questions and give you advice that WILL lead to better standing for your shop! We’ll discuss your designs, you’ll get tips of what to make and what to offer in your shop so you’ll be able to stand out from the masses.

The value of this giveaway is $75! (this service is not yet on the market!)

Want to win THE Personalized Business Revamp Package? Here is how to enter: NOW CLOSED!!!!

Must do the first 2 in order to enter!! (mandatory)

Leave a comment for each of the following entries:

additional entries:

  • friend Whimsy Couture on facebook
  • subscribe to our mailing list and blog updates via the pink box on the top right and the “follow via email” line! (activate subscriptions please!)
  • 5 xtra entries for posting this giveaway on your facebook! (tag Whimsy Couture and Whimsy Couture Sewing Patterns!)

Giveaway is open worldwide and will end Thursday, January 5, 2012 (midnight) NOW CLOSED!!!!

Free Snowflake Applique Shape

Free Snowflake Applique Shape

Enjoy this pretty snowflake template that you can use for your own projects or projects you sell. Please don’t sell the template itself. Thank you!
Free snowflake applique' template for download*this post got updated on July 25, 2016!

I’m sharing a free snowflake applique’ template for download! Get all the details from my other blog at DIY Crush! You will also find the link to the free top shown above. It is part of a knit pajama sewing pattern in size 9.


New Sewing Pattern Out – Fleece Mittens For Girls And Boys


NEW SEWING PATTERN for making easy fleece mittens for sizes 12m – age 10. Fits for boys and girls.

Add a cute ruffle for the girly version and some felt flowers! This tutorial contains:

-pdf files with templates to cut out your desired size from XS through L

-tutorial with step by step instructions and lots of pictures


~
You will need: fleece, a sewing machine, thread, scissors, 1/4″ elastic, decorative trim optional, and basic to advanced sewing skills

~
SEWING PATTERNS/TUTORIALS CANNOT BE RETURNED OR REFUNDED!

~ A big thank-you to my pattern testers for some of the pictures!

Purchase it here for $6.00:

Add to Cart

View Cart