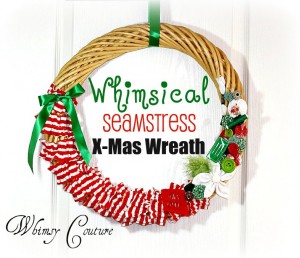
I love sewing that much that I made myself this whimsical Christmas wreath! 🙂
https://watchesbuy.gr
I love sewing that much that I made myself this whimsical Christmas wreath! 🙂
I love sewing that much that I made myself this whimsical Christmas wreath! 🙂
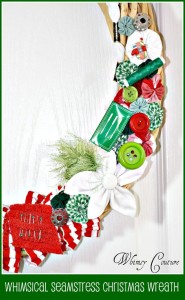
It has pins, bobbins, yarn, buttons, fabric yoyo’s, sewing machine needles, embroidery floss, thread spool, chenille swatch, ribbon and handmade fabric ruffles!
And it’s hanging on my front door!


