• Home
  • Shop
    • Tops & Dresses
    • Pants & Skirts
    • Capes & Jackets
    • Rompers & Overalls
    • Ladies Sewing Patterns
    • Boys Sewing Patterns
    • Hats & Scarves
    • Miscellaneous Sewing Patterns
    • Pet Bed Sewing Patterns
  • My Account
    • Checkout
    • Cart
    • Logout
  • Affiliate Area
    • Info About The Affiliate Program
  • Blog
    • Whimsy Couture
      • Free Tutorials
      • Free Patterns
      • Pattern Sales
      • Giveaways
      • Pattern Shop
      • Reviews
      • Software for PDF patterns
    • DIY Crush Free Patterns & Tutorials
  • About
  • FAQ
  • Contact
  • Disclosure Policy
  • Skip to primary navigation
  • Skip to main content
  • Skip to primary sidebar
  • Home
  • Shop
    • Tops & Dresses
    • Pants & Skirts
    • Capes & Jackets
    • Rompers & Overalls
    • Ladies Sewing Patterns
    • Boys Sewing Patterns
    • Hats & Scarves
    • Miscellaneous Sewing Patterns
    • Pet Bed Sewing Patterns
  • My Account
    • Checkout
    • Cart
    • Logout
  • Affiliate Area
    • Info About The Affiliate Program
  • Blog
    • Whimsy Couture
      • Free Tutorials
      • Free Patterns
      • Pattern Sales
      • Giveaways
      • Pattern Shop
      • Reviews
      • Software for PDF patterns
    • DIY Crush Free Patterns & Tutorials
  • About
  • FAQ
  • Contact
  • Disclosure Policy

Whimsy Couture Sewing Patterns

Childrens Sewing Patterns

whimsy header

free sewing tutorials

Free Tutorial How To Add Ruffles To Sleeves

by 4 Comments


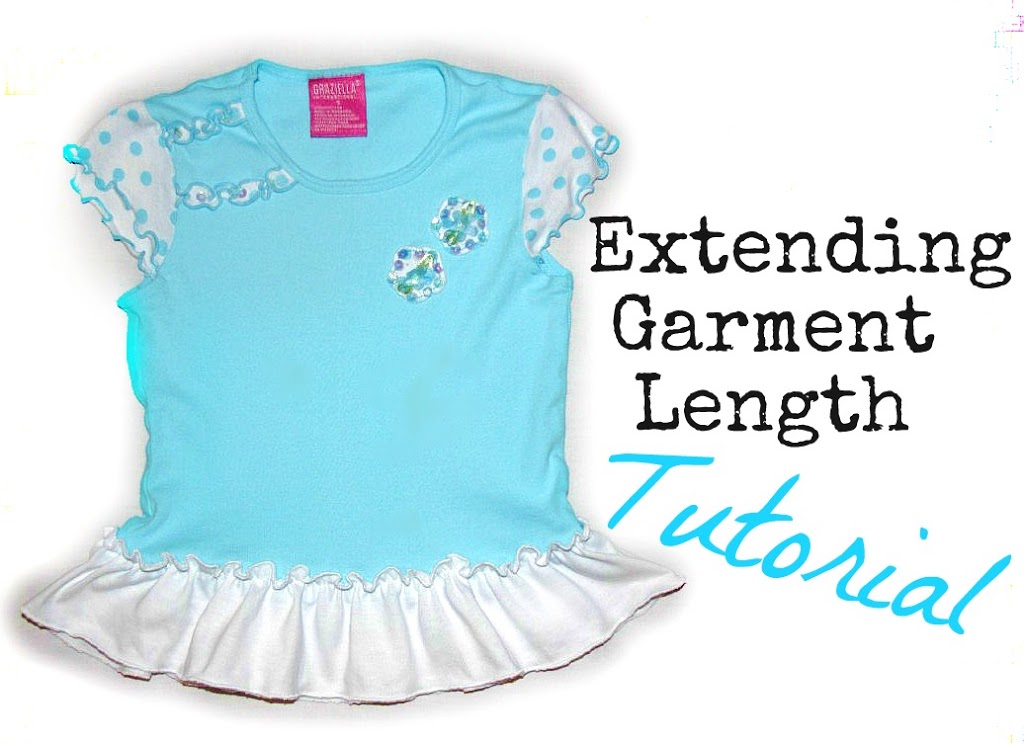
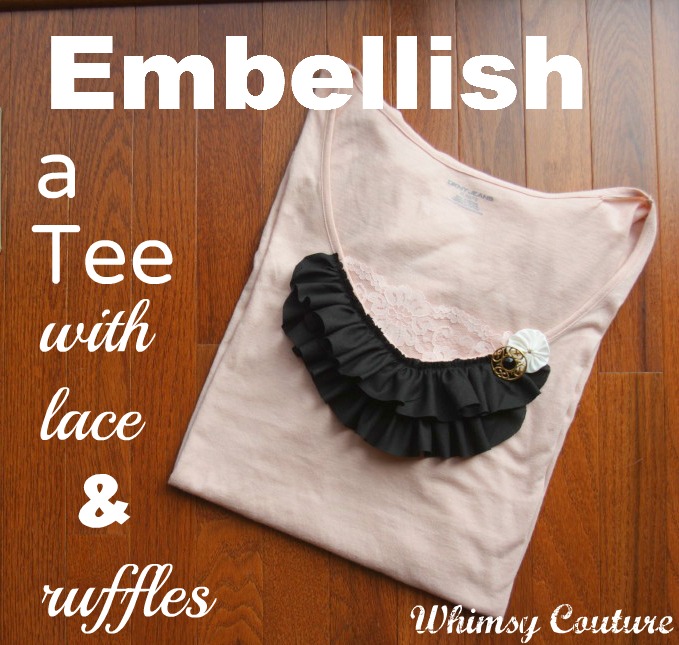
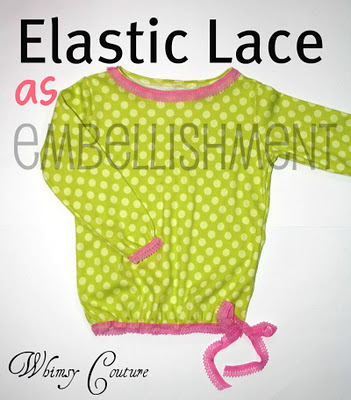
This is an easy and fun way to add length to outgrown sleeves or to add a special touch to an outfit and make it match. 
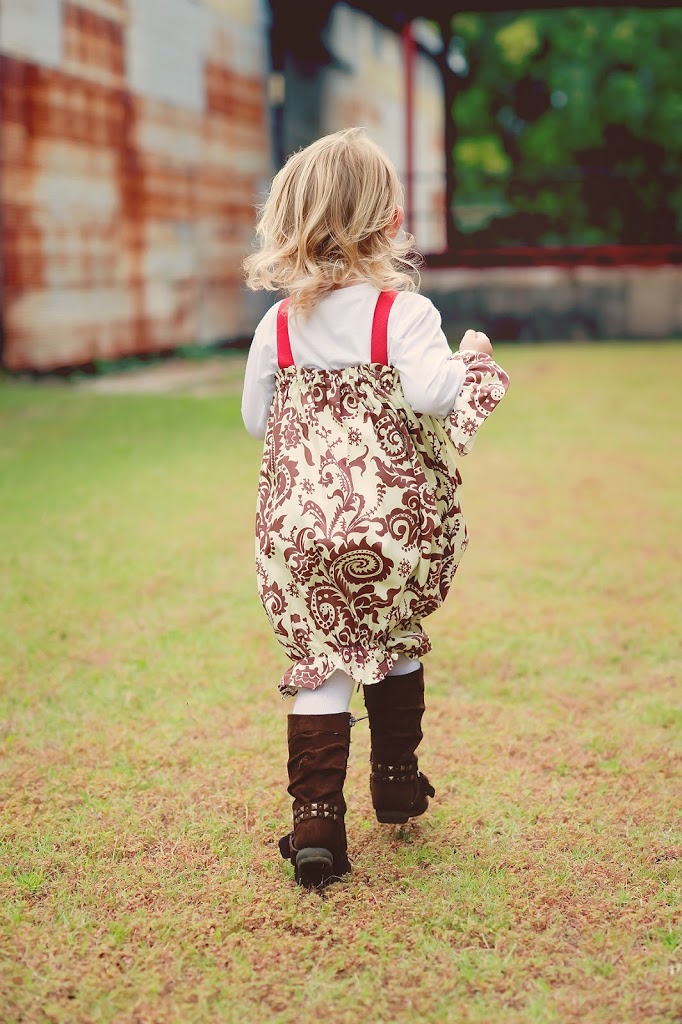
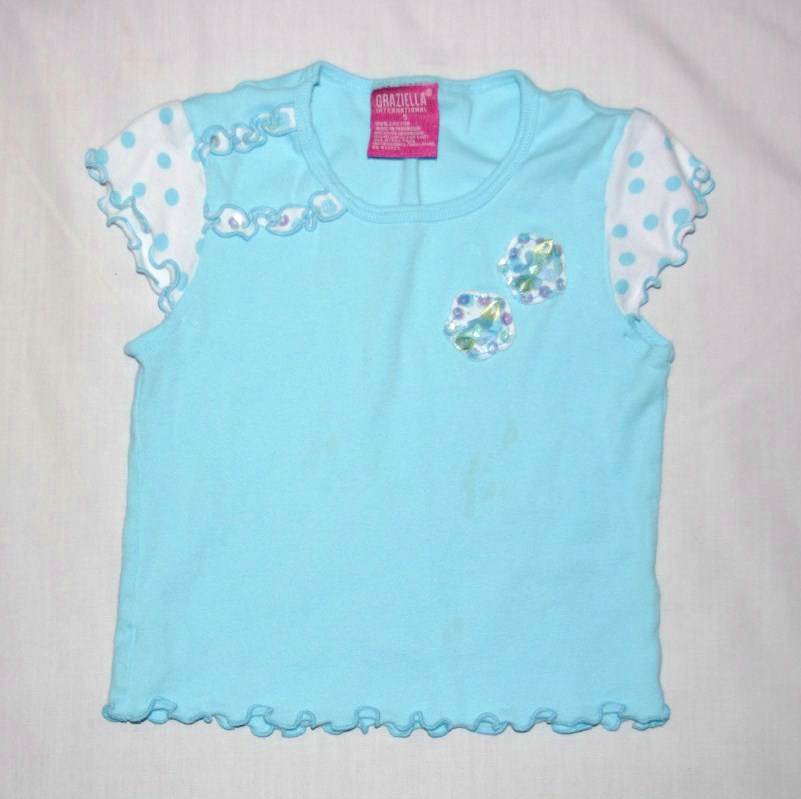
I chose to make a matching tee to go with my STRAPPY DRESS
(pattern available here).
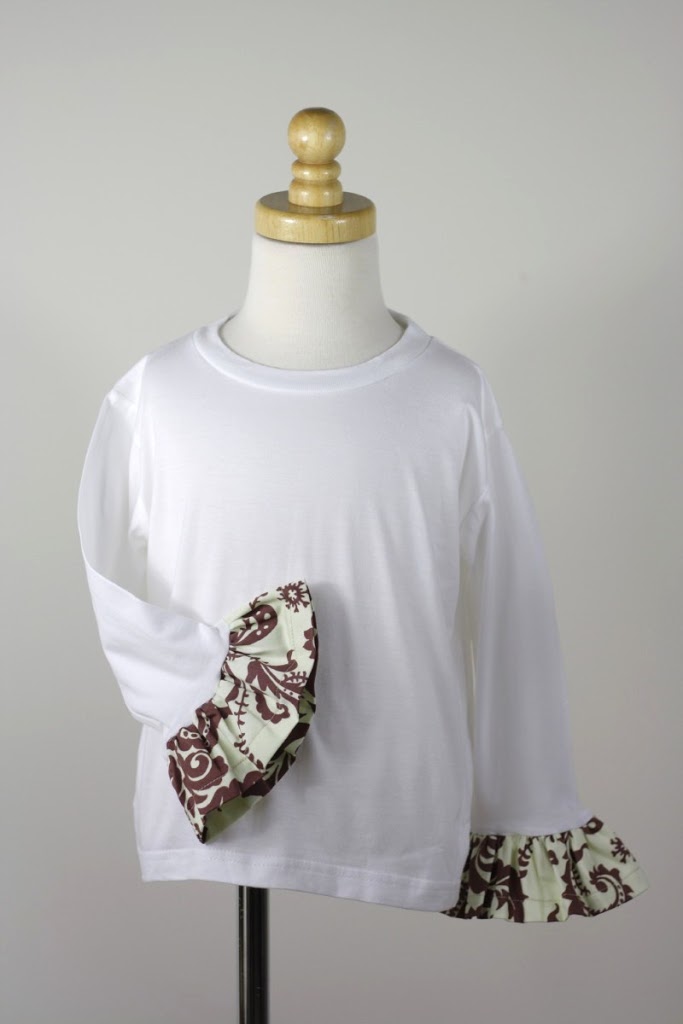
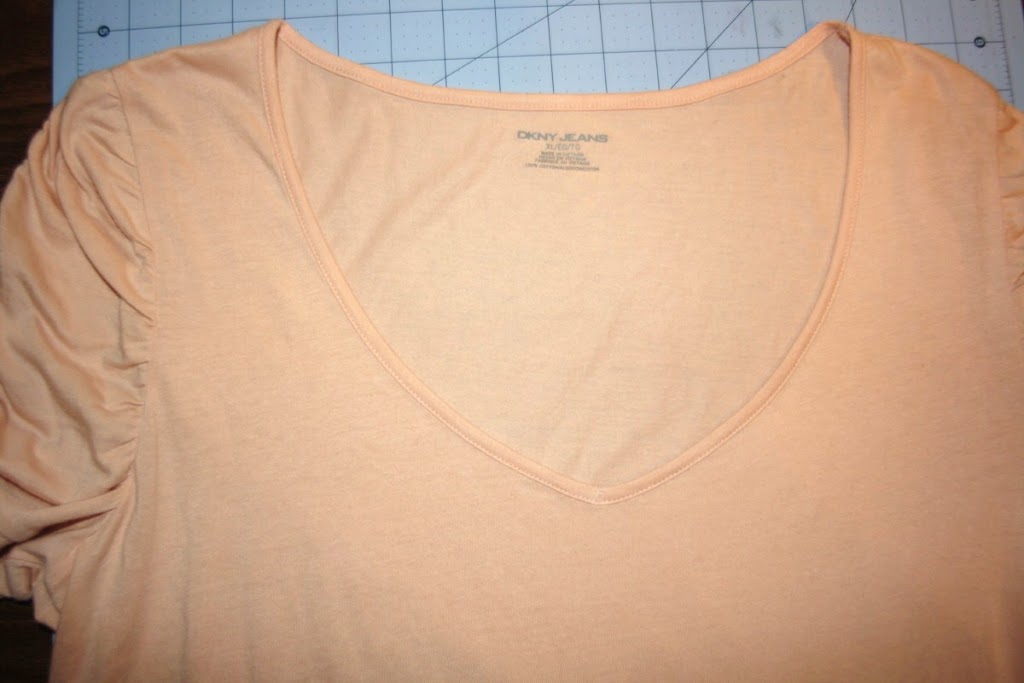
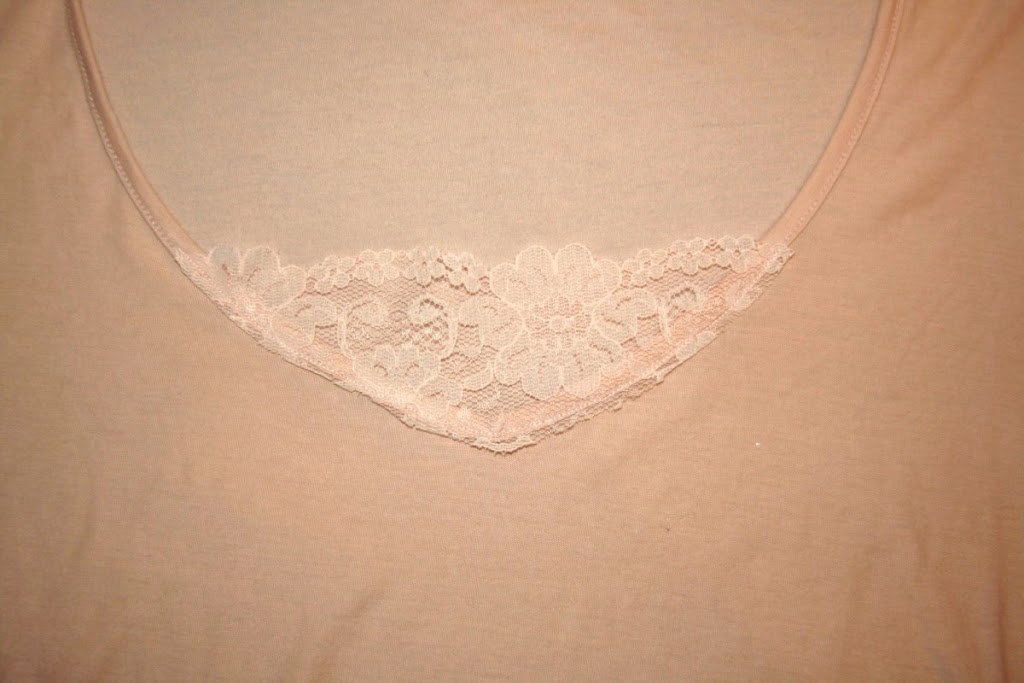
Here is my tee:


This is what I did:

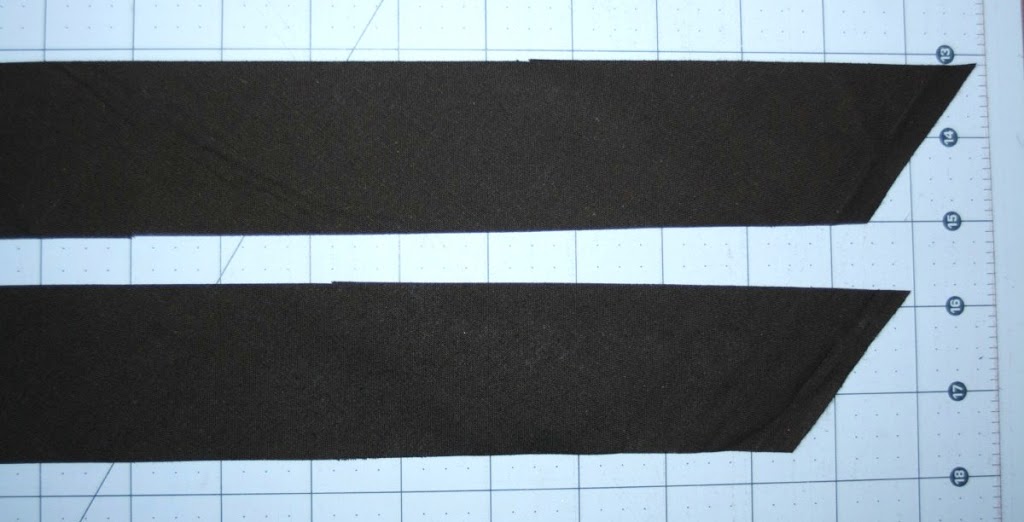
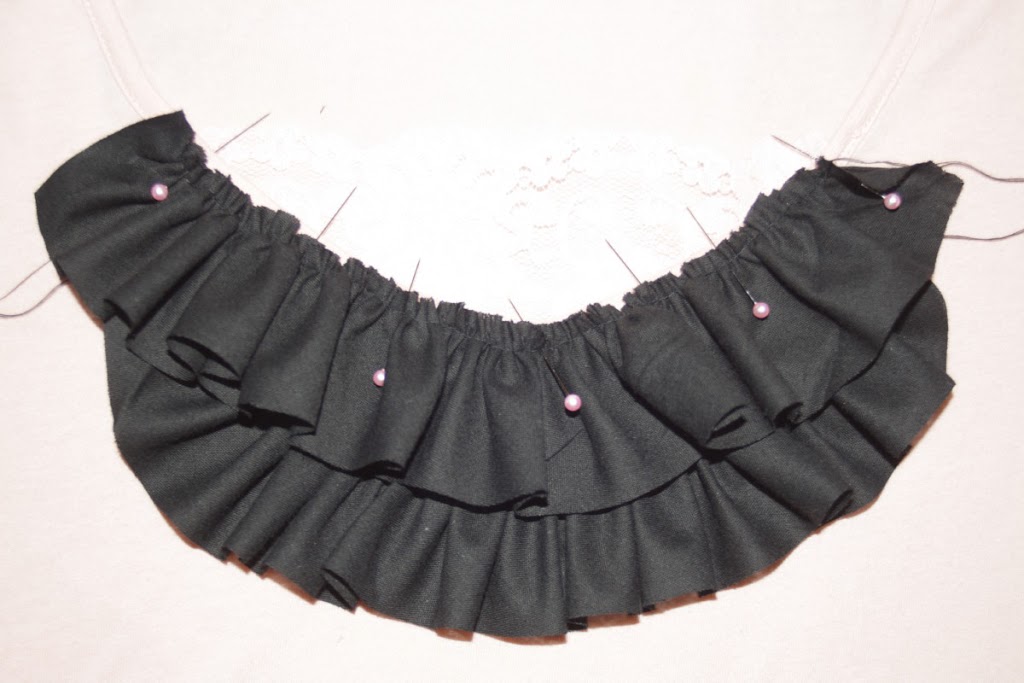
I measured the sleeve width……..

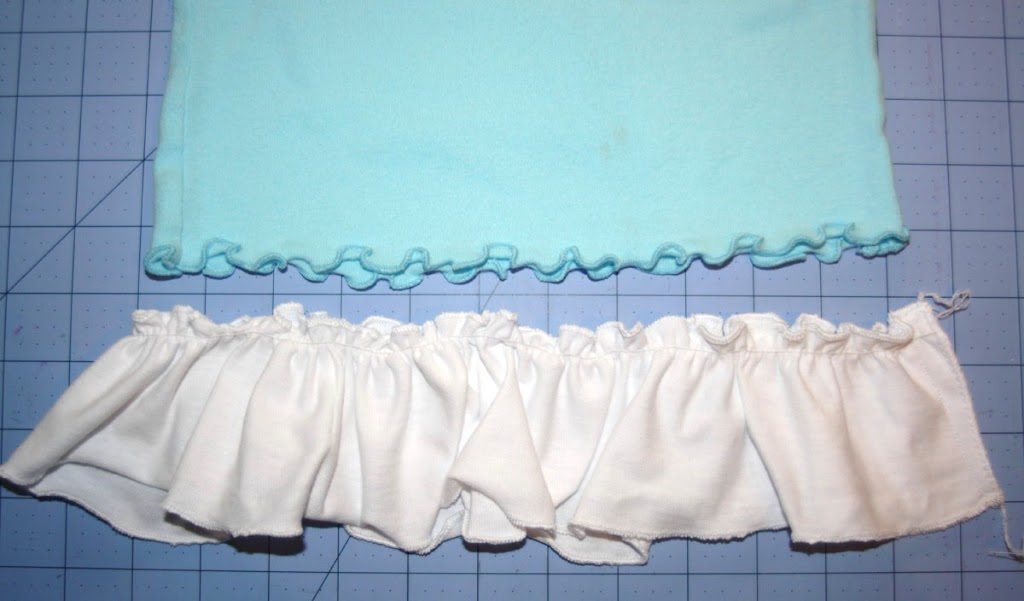
….then cut a piece of fabric 3″ long (measured from top to bottom) and twice the width of my sleeve (front and back), serged the bottom edge and folded it 0.5″ up, press it and sewed it down:

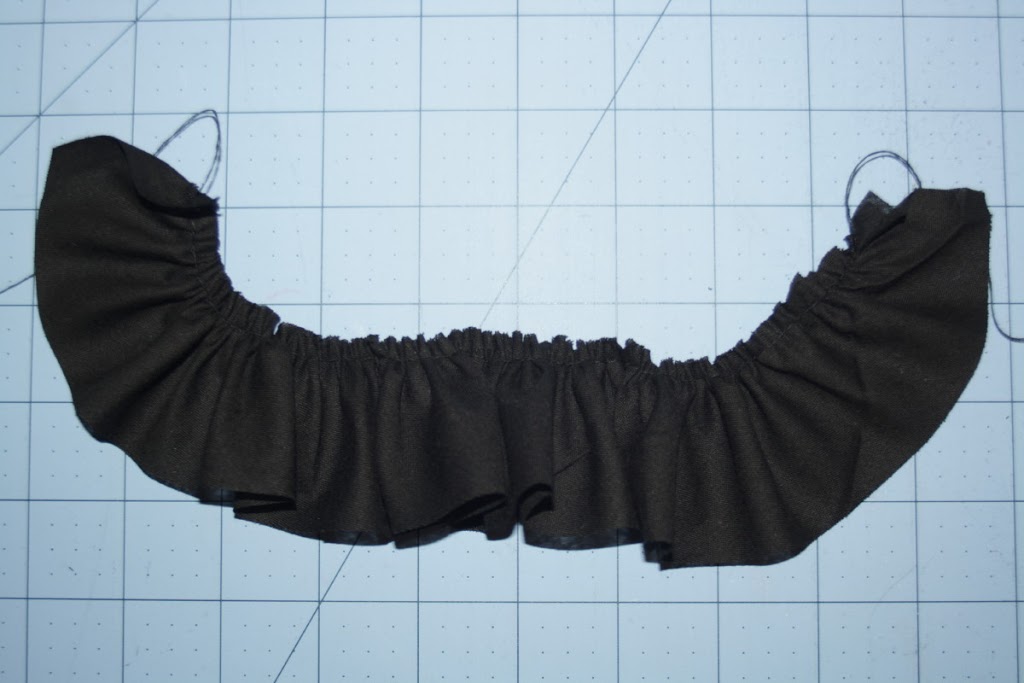
I ruffled this strip with my machine…..

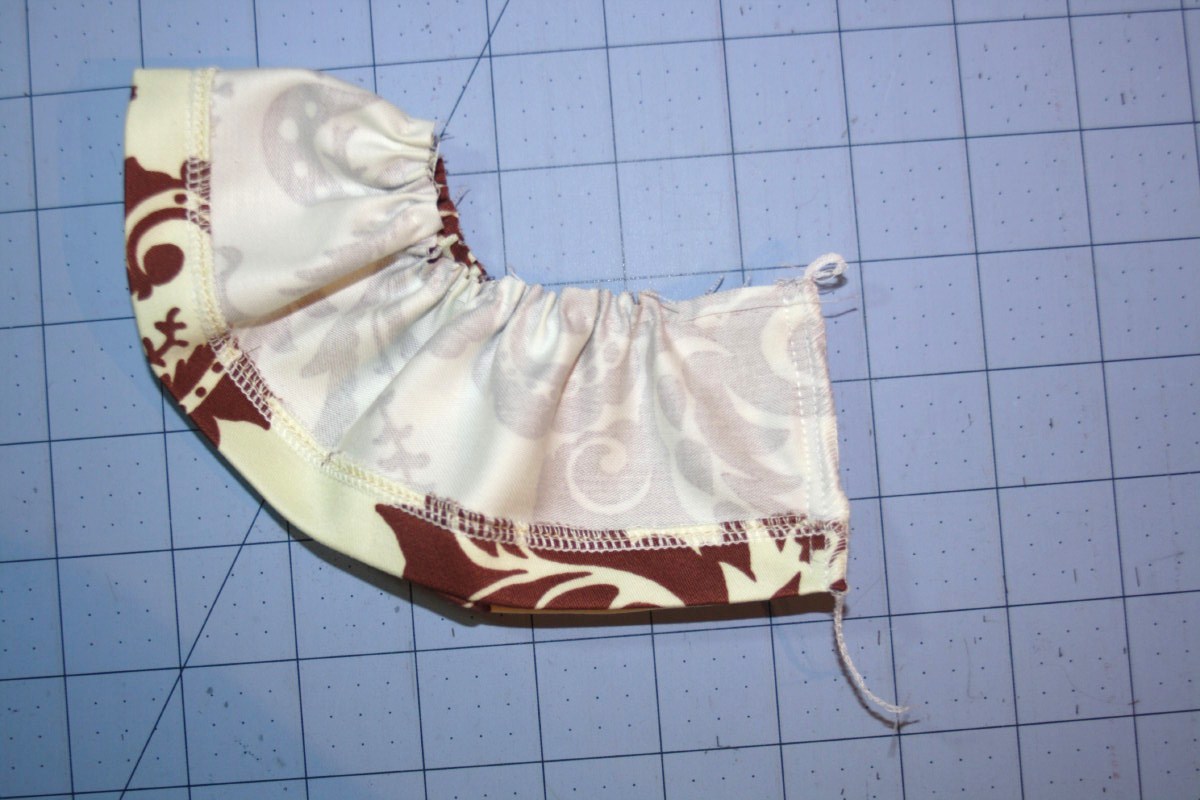
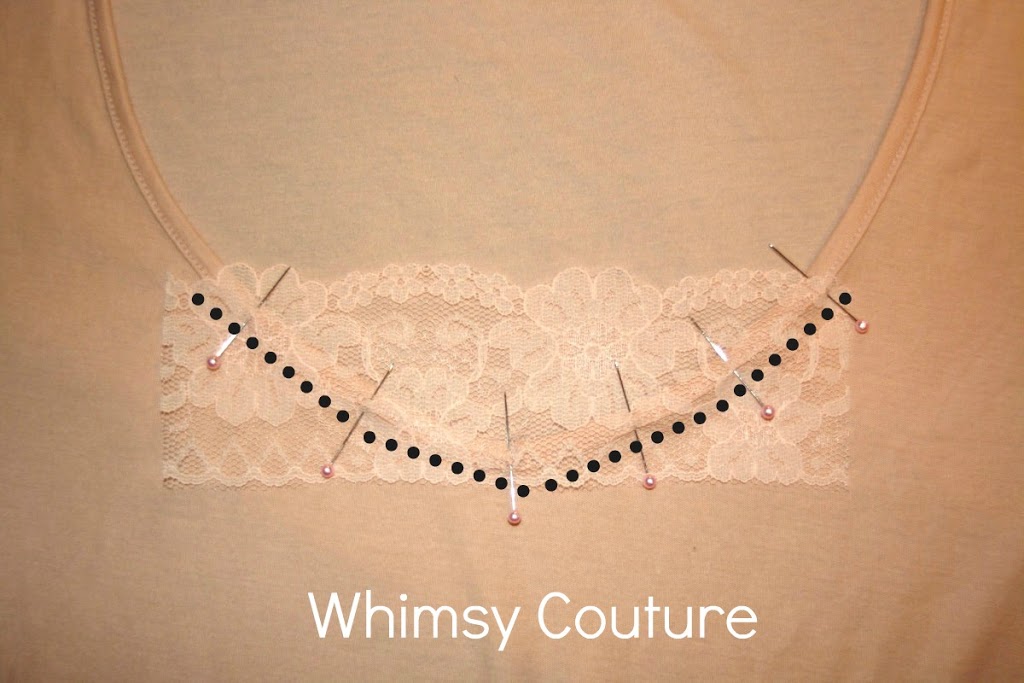
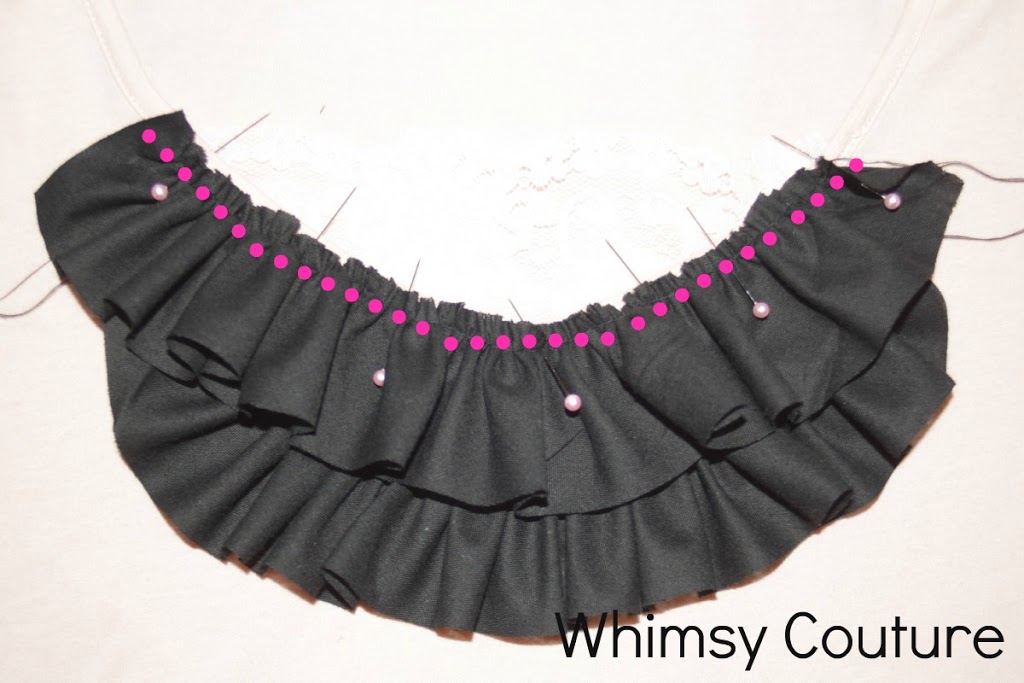
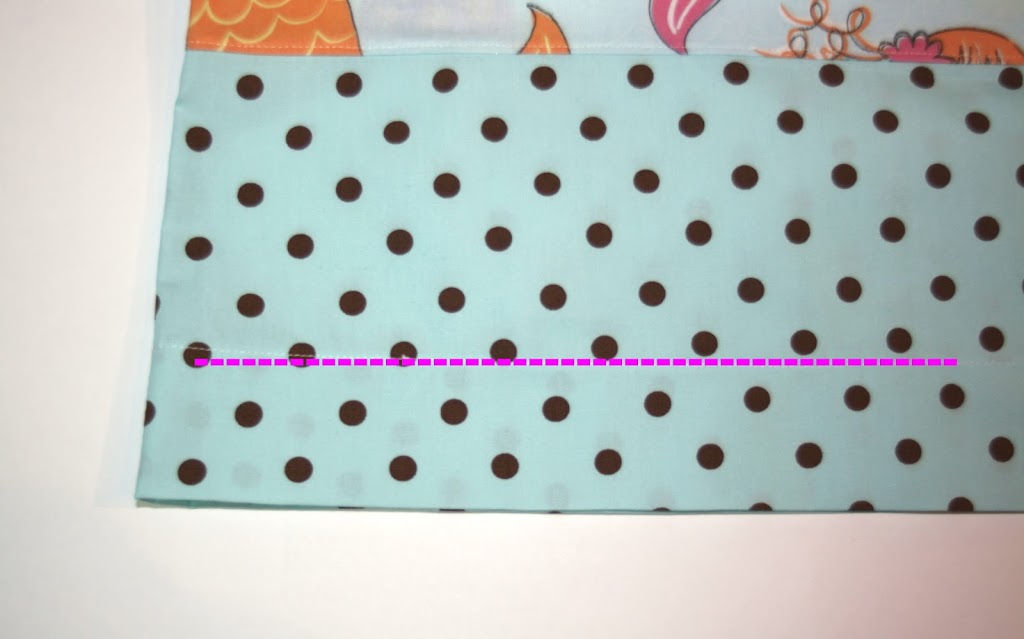
Folded it in half with right sides together, then pinned and sewed it along pink dashes:

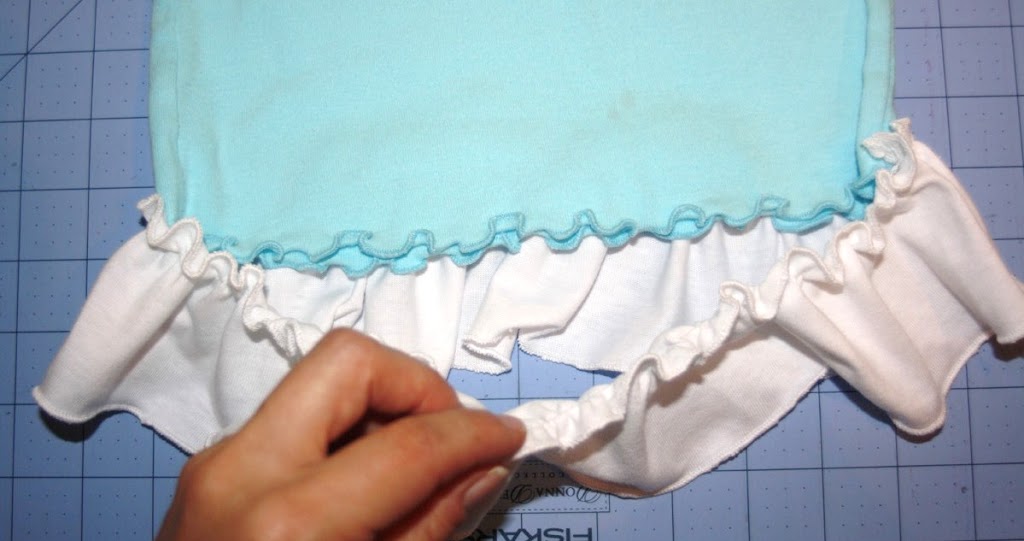
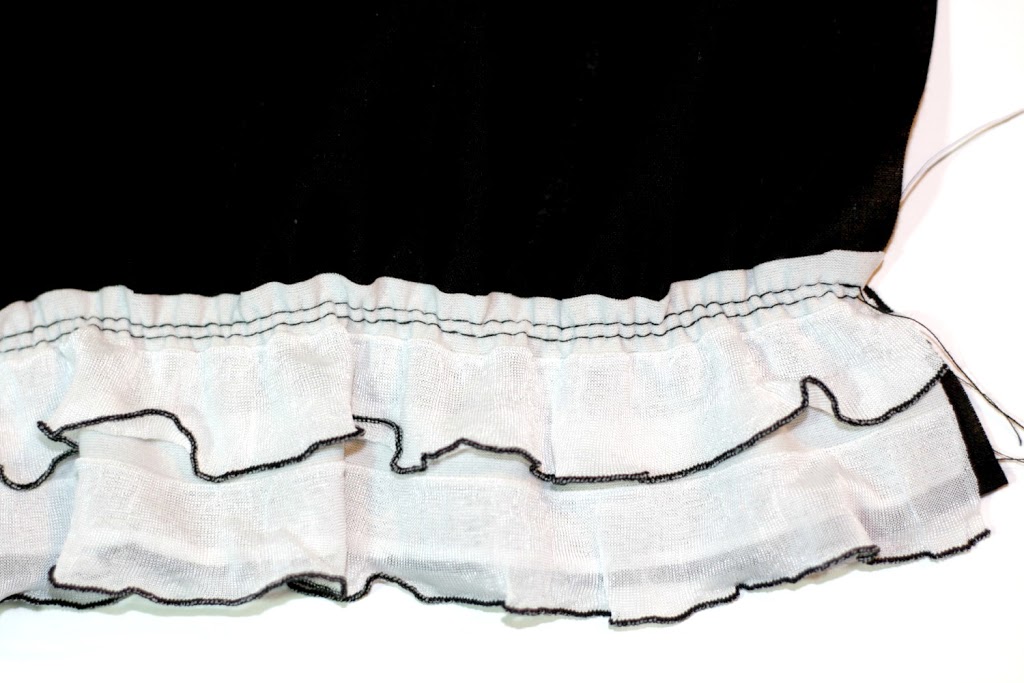
This is now my sewn together sleeve ruffle with the edges serged/hemmed:

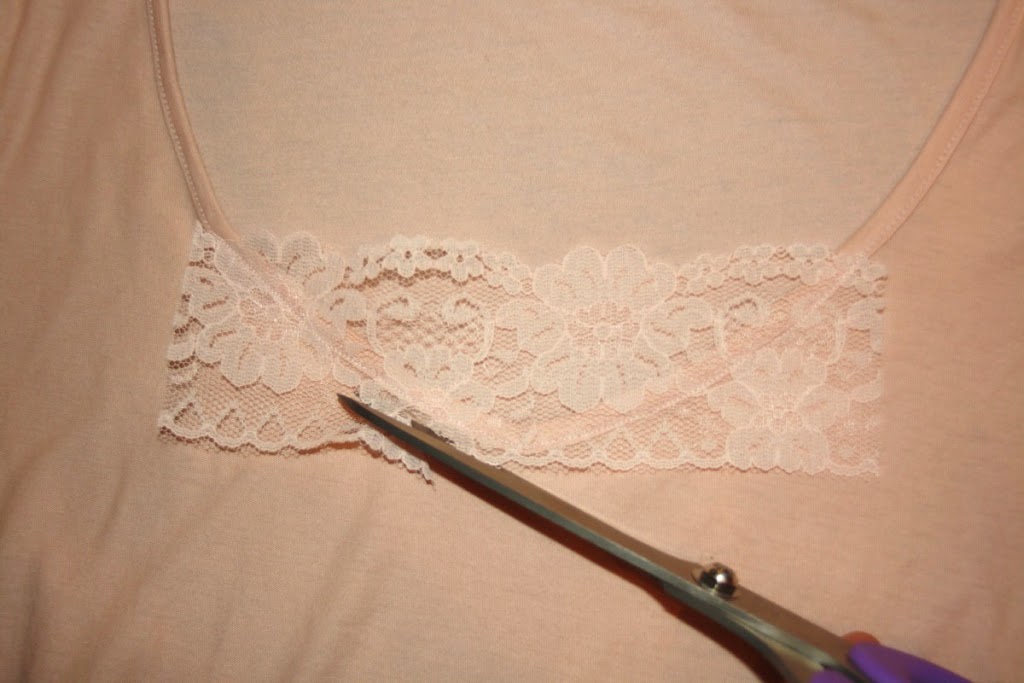
I trimmed off my sleeve’s bottom hem…..


I positioned the ruffle underneath the sleeve like this:

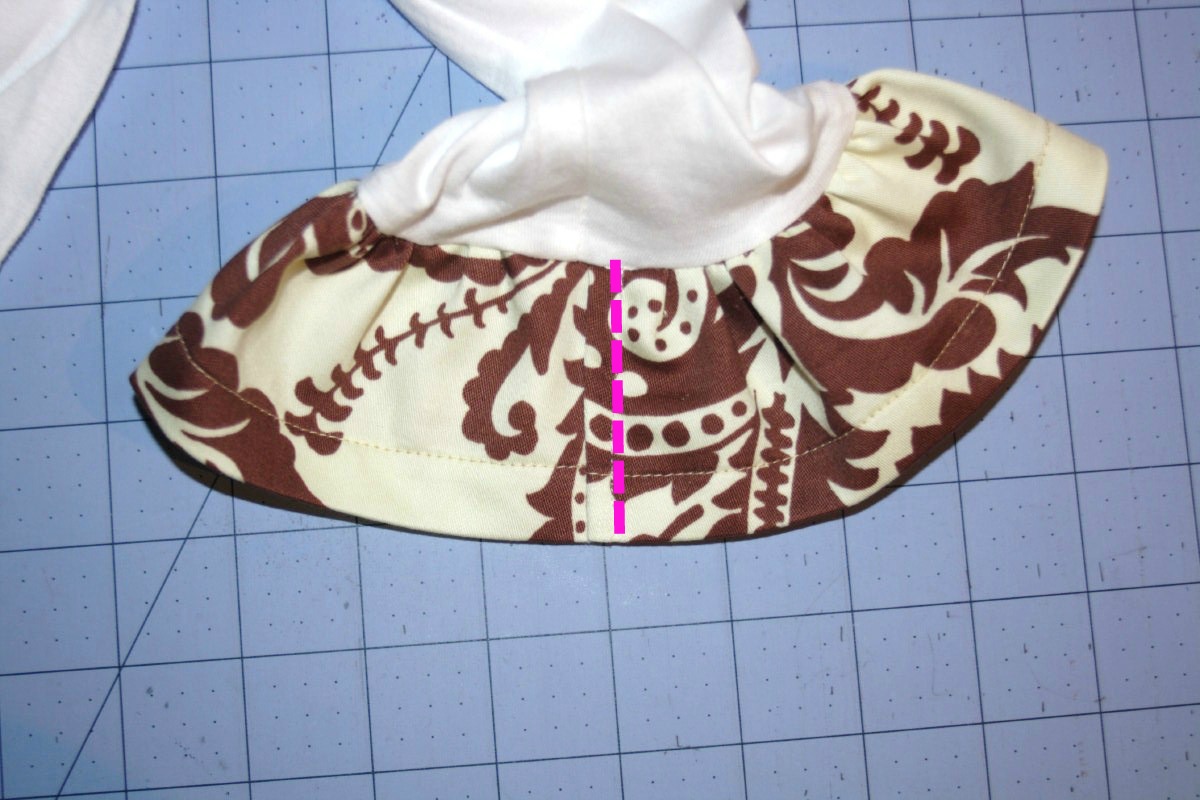
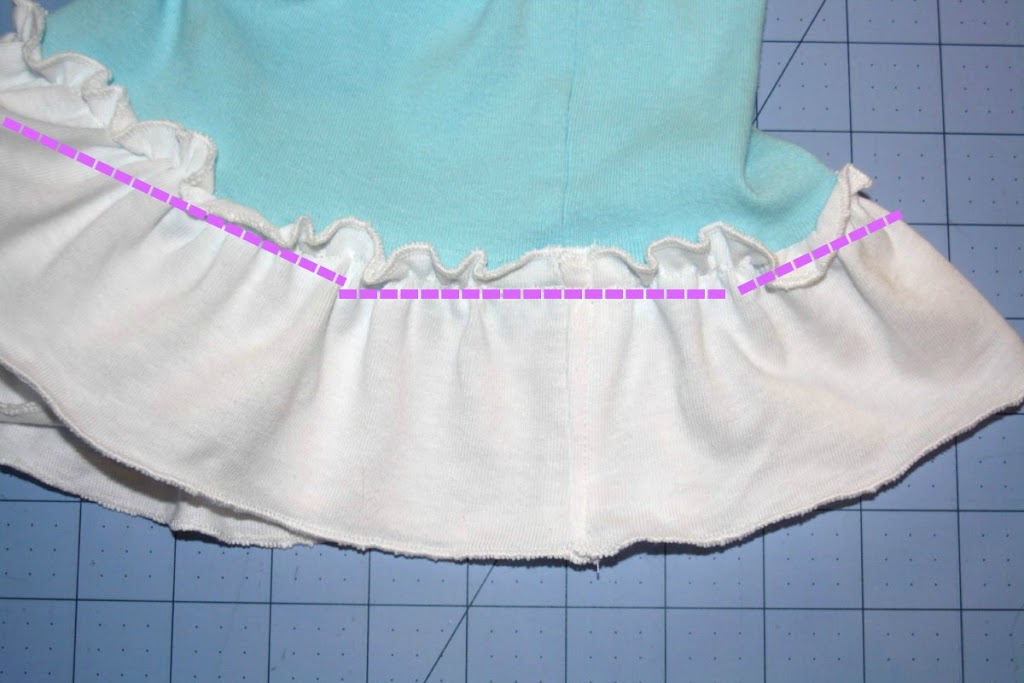
and pinned the ruffle to the sleeve with right sides together, then sewed it on:


This is now my sewn on ruffle with the edges serged/.hemmed:

The finishing touch is to tuck in all threads and top stitch to make it look nice and neat…..

…..like this:

Repeat with second ruffle and other sleeve.
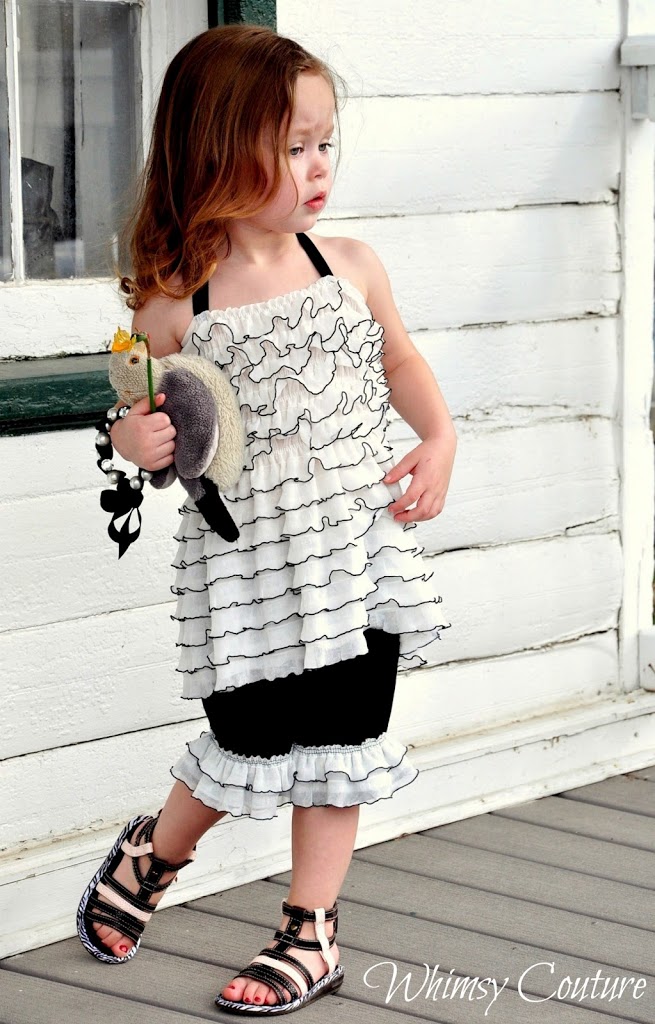
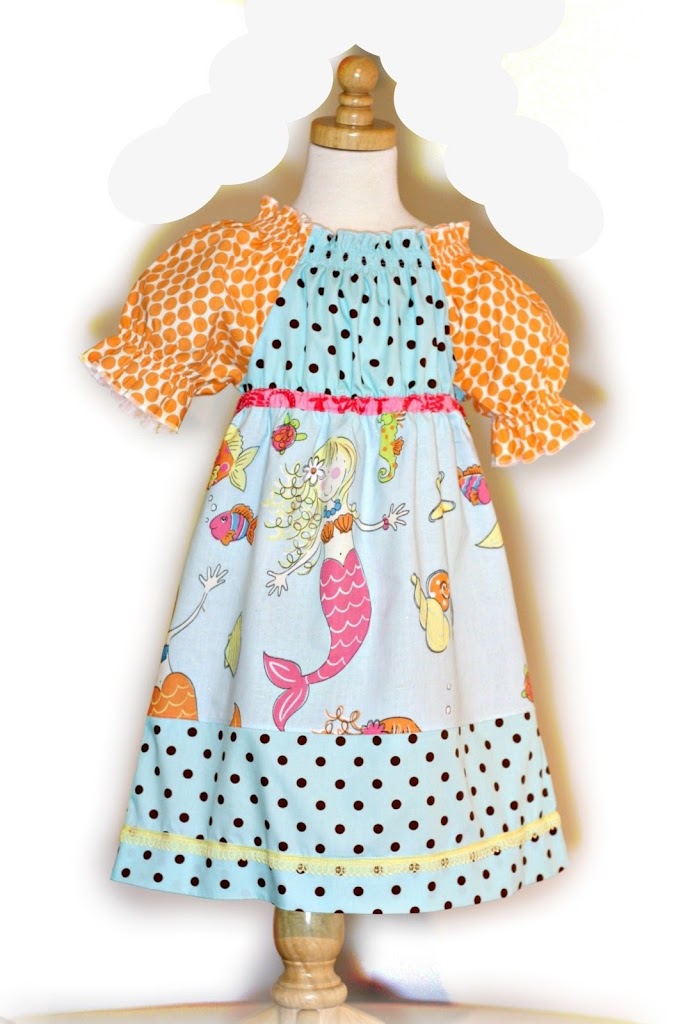
Ta-Da! Done!

 
If you like this Free Tutorial How To Add Ruffles, please pin it!
Pin It


How To Reuse Old Clothes To Make Knit Pants

by Leave a Comment

How To Reuse Old Clothes To Make Knit Pants


Do you have old knit t-shirts with holes, stains etc.? Don’t throw them away! There is always something that can be made with them! I especially love re-using them for making my daughter new clothes.

Here is a old t-shirt from me. Still in great condition so I used the bottom portion of it:


I used my KNIT LEGGINGS PATTERN for this and already have the template ready so I placed it onto the material and got about half the length of my template:
Here are my two top portions of my new knit pants:


I did the same thing with another t-shirt and selvaged the middle part of my color block knit pants. I sew this part onto the upper portion:
Then, for the bottom part, the ruffle I selvaged another t-shirt’s bottom:
Here is my last portion, the ruffle, to be sewn on:
This is now one of my “finished” knit pants leg which is ready to be sewn together according instructions:
And here is my finished COLOR BLOCK knit pants from old t-shirts:
Like this idea? Please pin it!

Pin It

Embellishment Tip – Hem With Decorative Lace Elastic

by Leave a Comment

Decorative lace elastic is a very versatile and fun supply for sewing. I love using it as embellishments for clothes.

See my review and the free tutorial on how to Hem With Decorative Lace Elastic HERE.
The blue shorts are made with my KNIT LEGGINGS pattern (cropped to shorts length) and instead of folding the leg hems and sewing them down, I added decorative lace elastic to the hems plus a little fun bow to the front.

Like this tip? Please pin it!

Free Tutorial – How To Extend A Garment’s Length

by 1 Comment

Pin ItAn important part of saving money when clothing our children is to upcycle, recycle or fix existing, damaged and outgrewn clothes. Not only for girls for also for boys this can be done, minus the ruffles:)


Here is a cute t-shirt my daughter outgrew:


It still fit across the chest nicely but the length was lacking a couple of inches. There are several things to do with it! I chose to simply extend the length by adding ruffles! The t-shirt was made from knit so I chose an old white t-shirt for its “donor” and cut a strip off about three times the width (measured from side to side) of my t-shirt and about 3″ long (measured from top to bottom).

First step: since I wanted to mimic the cute rolled lettuce edge hems on the sleeves I set my serger to “rolled hems” and hemmed the top and bottom edge of my strip:


Then I ruffled the top edge and folded the ruffle strip in half and pinned then sewed the small edges together (marked with pink dashes). I backstitched beginning and end:
 
 Second step: I place my sewn together ruffle underneath my t-shirt’s bottom hem:

  
Third step: I place the ruffle back underneath my t-shirt’s back……….

 
 ……..to prevent from pinning through the t-shirt I placed a magazine into the t-shirt:


Fourth step: I pinned ruffle to the bottom hem (and made sure I have the ruffle’s side seam on my t-shirts side seam) of the t-shirt and sewed it on with a knit stitch (or slight zigzag stitch)


Last step would be to tuck in hanging threads and tack them down. 


Done! One less thing to buy!


If you like this tutorial please pin it:

Pin It 
For more tutorials please click HERE!

Whimsy Couture Patterns on ETSY:


Free Tutorial – Embellish A Tee With Lace & Ruffles

by Leave a Comment

 
I bought this tee a while ago but never wore it because it had a huge V-neck. I never thought of putting a tank underneath LOL
 
  
 I took a piece of lace (it happened to be the same color!) and cut it off so it would reach a bit over each side:
  
 …….I turned my tee inside out, pinned the lace and sewed it down with a straight stitch:
 
  
 Then I trimmed off the access:
  
This was my tee from the inside:
  
………and this from the outside:
  
I took it a step further and cut some black cotton fabric on the bias (so it wouldn’t fray). I cut 2 strips about as long as my tee was wide:
 
…….ruffled it with my machine, 
 
 
……made 2 ruffles, pinned them onto the tee ………
 
 
………and sew each one on separately:
 Then I added a pretty button……….
 
 
Done!
 

Pin It

Free Sewing Patterns And Tutorials At DIY Crush

by 2 Comments

Check out DIY Crush for lots of free sewing patterns and tutorials.

DIY Crush Free Sewing Patterns and Tutorials


Free Tutorial – Add Ruffle Fabric As Trim

by 1 Comment

Premade ruffle fabric is not only great to use for making clothes etc. but also for adding special touches to “regular” patterns!
For this project I used my NO SERGER BLOOMERS pattern and followed the steps for the longer legs up until section “to sew legs together”.


You want to spread out your bloomer leg with right side up and place a strip of ruffle fabric (about 2-3 rows of ruffles) onto the leg piece.  You can leave the bottom hems unfolded but serge the edge or use a zigzag stitch. I placed my ruffle fabric strip so that the bottom ruffle hem aligned with my leg hem.
Use elastic thread in your lower compartment and regular thread on top. That way your leg will scrunch up a bit.


Then pin and sew two rows right above the top ruffle row with a long straight stitch and tension at 2-3:


Then steam press the sewn area from the wrong side and finish bloomers as instructed.


Now you have a beautiful customized pair of bloomers for your little girl! The matching PETTI RUFFLE TANK/DRESS pattern is available HERE.

petti tank dress sewing pattern (17)

Whimsy Finds – A Free Tote Bag Sewing Pattern

by 3 Comments

Whimsy found…….a free pattern to make this cute tote bag!
~
Found at Sew Prim Khris blog!

Pin It

Many Uses For Elastic Lace – Embellish The Bottom Hem Of A Dress

by 2 Comments

A few weeks ago I had the pleasure to review some elastic lace to add some fun to this knit t-shirt. Read the entire review plus tutorial HERE!

I love adding trim to the bottom hem of a dress and for this post I chose to sew the elastic lace right on top of the hem seams (as marked with pink lines):


I didn’t stretch the lace since I didn’t want to scrunch up my fabric. Once sewn on, it looks like this:
 
 Here is my finished peasant dress:
 Elastic lace from:


Laurl, the owner offers some beautiful stuff such as fabrics and embellishments including elastic laces, ribbon roses and flowers, fiber embellishment nest kits and trims of all types.


Find Laurl here:

  • etsy

Pin It

To find great sewing patterns please visit my ETSY SHOP!

Free Pattern – Valentine’s Heart Plushie

by Leave a Comment

Remember this post from last year? My kids still love their funny looking heart plushie!:)

Make one this Valentine’s Day to give it to YOUR kids!

Click HERE to get your download!

Pin It

Primary Sidebar

Affiliates & Sponsors (see our disclosure policy in the top menu)

Follow Whimsy Couture

  • Facebook
  • Instagram
  • Pinterest
  • Twitter

Search For A Blog Post

Search For A Pattern

Product Categories

  • Boys Sewing Patterns
  • Girls Dress Sewing Patterns
  • Girls Jacket Sewing Patterns
  • Girls Pants & Skirts Sewing Patterns
  • Girls Romper Sewing Patterns
  • Kids Hats & Scarves Sewing Patterns
  • Ladies Sewing Patterns
  • Miscellaneous Sewing Patterns
  • Patterns
  • Pet Bed Sewing Patterns
  • Uncategorized
  • Home
  • Shop
    • Tops & Dresses
    • Pants & Skirts
    • Capes & Jackets
    • Rompers & Overalls
    • Ladies Sewing Patterns
    • Boys Sewing Patterns
    • Hats & Scarves
    • Miscellaneous Sewing Patterns
    • Pet Bed Sewing Patterns
  • My Account
    • Checkout
    • Cart
    • Logout
  • Affiliate Area
    • Info About The Affiliate Program
  • Blog
    • Whimsy Couture
      • Free Tutorials
      • Free Patterns
      • Pattern Sales
      • Giveaways
      • Pattern Shop
      • Reviews
      • Software for PDF patterns
    • DIY Crush Free Patterns & Tutorials
  • About
  • FAQ
  • Contact
  • Disclosure Policy

© 2025 · Elise Genesis WordPress Theme · by One Happy Studio

This website uses cookies to improve your experience. We'll assume you're ok with this, but you can opt-out if you wish.Accept Read More
Privacy & Cookies Policy

Privacy Overview

This website uses cookies to improve your experience while you navigate through the website. Out of these, the cookies that are categorized as necessary are stored on your browser as they are essential for the working of basic functionalities of the website. We also use third-party cookies that help us analyze and understand how you use this website. These cookies will be stored in your browser only with your consent. You also have the option to opt-out of these cookies. But opting out of some of these cookies may affect your browsing experience.
Necessary
Always Enabled
Necessary cookies are absolutely essential for the website to function properly. This category only includes cookies that ensures basic functionalities and security features of the website. These cookies do not store any personal information.
Non-necessary
Any cookies that may not be particularly necessary for the website to function and is used specifically to collect user personal data via analytics, ads, other embedded contents are termed as non-necessary cookies. It is mandatory to procure user consent prior to running these cookies on your website.
SAVE & ACCEPT