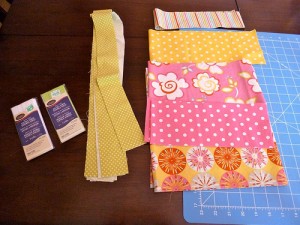
• Home
  • Shop
    • Tops & Dresses
    • Pants & Skirts
    • Capes & Jackets
    • Rompers & Overalls
    • Ladies Sewing Patterns
    • Boys Sewing Patterns
    • Hats & Scarves
    • Miscellaneous Sewing Patterns
    • Pet Bed Sewing Patterns
  • My Account
    • Checkout
    • Cart
    • Logout
  • Affiliate Area
    • Info About The Affiliate Program
  • Blog
    • Whimsy Couture
      • Free Tutorials
      • Free Patterns
      • Pattern Sales
      • Giveaways
      • Pattern Shop
      • Reviews
      • Software for PDF patterns
    • DIY Crush Free Patterns & Tutorials
  • About
  • FAQ
  • Contact
  • Disclosure Policy
  • Skip to primary navigation
  • Skip to main content
  • Skip to primary sidebar
  • Home
  • Shop
    • Tops & Dresses
    • Pants & Skirts
    • Capes & Jackets
    • Rompers & Overalls
    • Ladies Sewing Patterns
    • Boys Sewing Patterns
    • Hats & Scarves
    • Miscellaneous Sewing Patterns
    • Pet Bed Sewing Patterns
  • My Account
    • Checkout
    • Cart
    • Logout
  • Affiliate Area
    • Info About The Affiliate Program
  • Blog
    • Whimsy Couture
      • Free Tutorials
      • Free Patterns
      • Pattern Sales
      • Giveaways
      • Pattern Shop
      • Reviews
      • Software for PDF patterns
    • DIY Crush Free Patterns & Tutorials
  • About
  • FAQ
  • Contact
  • Disclosure Policy

Whimsy Couture Sewing Patterns

Childrens Sewing Patterns

whimsy header

dress sewing pattern

Free Chloe Dress Pattern By Dawn

by 20 Comments

Hi everyone! Today I have a super special treat for you all! This is my very first guest post with a terrific tutorial! Please welcome Dawn!
 
Hi!  I’m Dawn and I blog over at Designed by Dawn Nicole.  I’m an Air Force wife and momma of a 3 1/2 and 2 year old with our third (and final) due in March.  I started sewing a few years ago as a way to fill my time in the small town we’re currently stationed in and I’ve fallen so in love with it (sewing, that is, not the small town!).  When Denise emailed me about guest posting here at the Whimsy Couture Blog, I seriously about fell out of my chair.  Her patterns were among the first I used when I began sewing and I’ve been a fan for a while now.  I’m so honored to be here and today I’m sharing this tutorial for The Chloe Dress.


The Chloe Dress Main


What You’ll Need:
 
-Fabrics of your choice (I bought a half yard bundle of 5 coordinating fabrics)
-2 packages of double fold bias tape (I used two different colors)
-Three 1″ Buttons
-1/8″ elastic (You’ll need three 2″ pieces)
-All Your Sewing Goodies
 
Let’s get into the measurements.  I promise it’s easier than it sounds.  You’re basically just cutting out a bunch of rectangles.  The ruffle ratio for this dress is 2:1.  We’ll be ruffling the top piece on the bodice and the skirts.  
The straps and strap loops will stay the same for most any size:
Straps: Cut four 2″x36″ pieces
Strap Loops: Cut one 3″x9″ piece (we’ll cut it in half later to form two loops)
 
This dress is based on two basic measurements.  You’ll need to measure your model’s chest (right under the armpits) and her length from armpit to knee.
My daughter’s measurements were 21″ for the chest and 14″ in length from chest to knee.  She typically wears a 2T.  I’ll give you the break down for the additional pieces you’ll need for the 2T and then show you how to adjust this to any size.
 
Bodice piece: Cut one 22″x4″ piece
Ruffle piece: Cut one 44″x2″ piece
Bottom Layer of Skirt: Cut one 44″x11″ piece
Top Layer of Skirt: Cut one 44″x4″ piece and one 44″x5″ piece
 
This makes my overall length of the dress 15″ before taking about about an inch in seam allowances.
 
To size this to your model:
 
Bodice Piece: Take your model’s chest measurement + 1″.  Your rectangle needs to be that number x 4″.  So for my daughter, I took 21″+1″ to get 22″, so my bodice piece is 22″x4″.
 
Ruffle Piece: Take your model’s chest measurement + 1″ and multiply by 2.  Cut this length x 2″.  So for my daughter, I took 21″+1″ to get 22″ and multiplied by 2 to get 44″ (44″ is your “ruffle ratio number”).  So my ruffle piece is 44″x2″.
 
Skirt Bottom Layer:  Use your ruffle ratio number (44″ for me) as the long side of the rectangle.  To get the width, take your model’s chest to knee measurement and subtract 3 inches.  So for my daughter, I took 3″ off her 14″ length measurement, I got 11″.  So I cut my rectangle to be 44″x11″.
 
Skirt Top Layer: Again, take your ruffle ratio number as your long side of your rectangle.  You want the total of these two rectangles to be 2″ shorter than you skirt’s bottom layer.  Since that made my top layer 9″ in length, I made one rectangle 44″x4″ and one 44×5″. 


Whew!  Are you still with me?  The math part is over!  Let’s get to the fun part: sewing!


P1010348


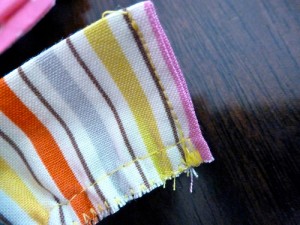
Unless otherwise noted, use a 1/4″ seam.  Finish all raw seams with a serger or zigzag stitch.  
 
We’ll start with the straps.  Iron the ends of each strap over about 1/4″ as seen in pic below.  Pin two of your strap pieces right sides together.  Sew with a 1/4″ seam leaving one end open for turning.  Clip the corners.  Turn strap right side out and press seams.  Topstitch using a 1/8″ seam all the way around.  (This will close up that open end).  Repeat for other strap.


P1010355 P1010357
 
Now take your strap loop piece.  Iron in half length wise.  Open it up and iron each side towards the center fold you just created.  Then fold in half lengthwise again and iron.  (Pretty much like you’re creating a piece of double fold bias tape).  Sew together with a 1/8″ seam and then cut in half so you have two pieces, as shown below.


P1010385
 
Set all strap pieces aside for later use.  Take your bodice piece and fold the short end under 1/4″ and iron.  Fold over another 1/4″ and iron again.  Sew and repeat for other end.
 
P1010359
 
Now your bodice piece looks like this:
 
P1010360
 
Set aside while we make the top ruffle.  Fold end short ends of the ruffle piece under 1/4″.  Then fold the entire piece in half length wise with wrong side together and iron again.  Sew the short ends closed.  (I’ve already ruffled and zig zagged in the below pic).


P1010354
 
You can use a ruffling or shirring foot to ruffle along the raw edge or you can set your stitch length to 5.0 and baste a 1/8″ seam.  Do not backstitch.  Pull along thread tails to ruffle by hand.  Ruffle until the piece is the same length as the top edge of your bodice piece.  Pin ruffle generously to top right side of bodice as shown below.
 
P1010362
 
Sew ruffle to bodice with a 1/4″ seam.  Flip ruffle up up and iron.  Topstitch with a 1/8″ seam.


P1010363


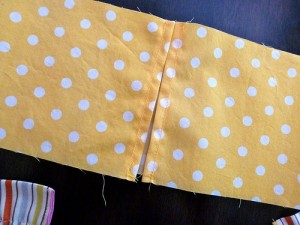
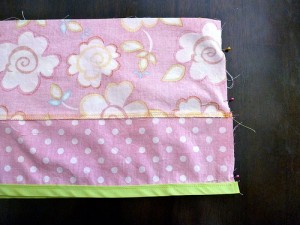
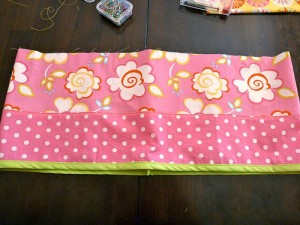
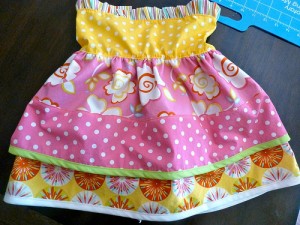
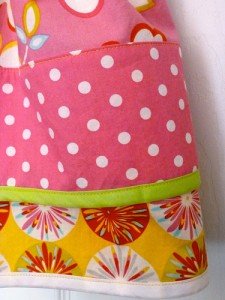
We’re done with the bodice for the moment.  Now take the two pieces of the top layer of your skirt and pin with right sides together along one long side.  Sew.  Open, iron seam, and topstitch with a 1/8″ seam.


P1010370


P1010372


Now take one of your bias tape colors and pin it along the bottom edge of this skirt piece.  Sew as close to the edge of the bias tape as you can, ensuring you catch both sides of the bias tape.
 
P1010374


Pin short sides of this skirt piece with right sides together and sew.  Invert, iron the seam and you’ll have a tube.
 
P1010375


P1010377


In the same manner, add the other color of bias tape to the bottom edge of the bottom layer of the skirt.  Again, pin the short sides of the skirt piece with right sides together and sew.  Invert, iron the seam and you’ll have another tube.
 
P1010378


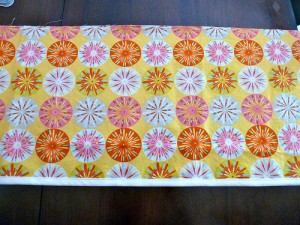
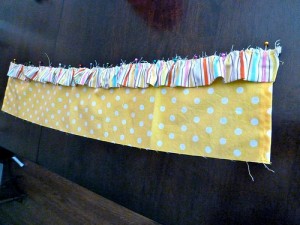
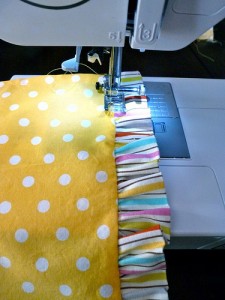
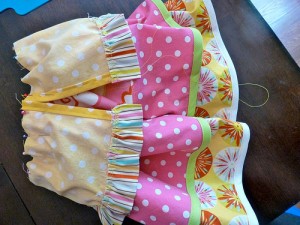
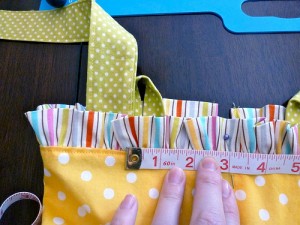
With rides side out, put the bottom layer inside the top layer of the skirt.  Pin together and ruffle the top edge of the skirt piece.  Ruffle until the skirt is the same size as the bodice piece.


P1010379


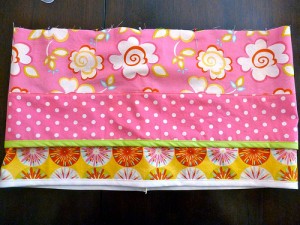
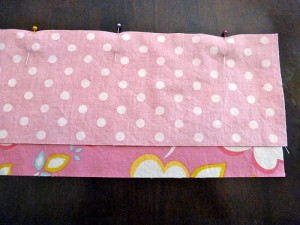
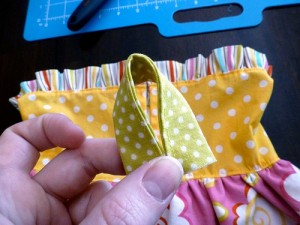
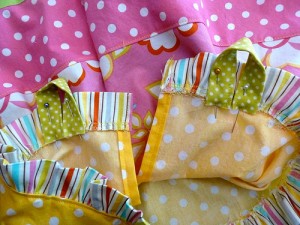
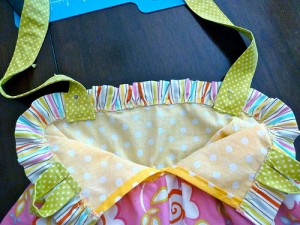
Now we’re going to attach the bodice to the skirt.  Pin the bodice to the skirt with wrong sides together as seen below.  You can put your skirt seams on the side of the dress or in middle of the back.  I choose the back since the bodice already has an opening in the same place.  Pin as if there wasn’t a break in the bodice.  Sew the bodice and skirt pieces together.

 
P1010381


P1010382


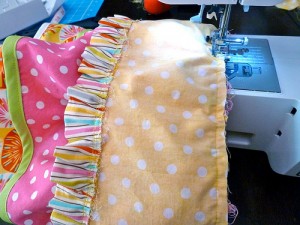
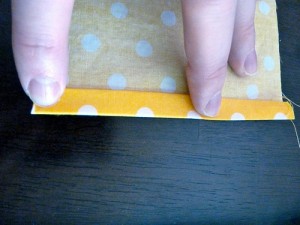
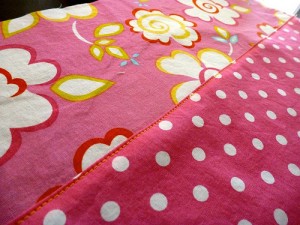
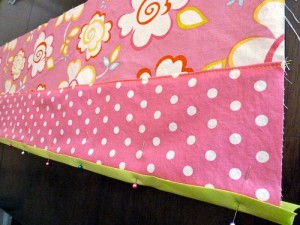
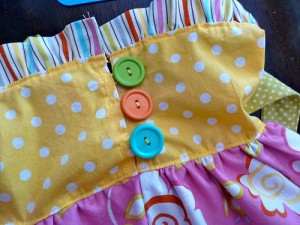
Flip the bodice up, iron the seam, and topstitch with a 1/8″ seam.
 
P1010383
 
Now we’ll add the straps.  Fold each strap loop as shown below and pin inside back of dress.  I pinned each strap loop about 1 1/2″ out to each side of the center of the back.  Sew in place.


P1010386


P1010387
 
Now pin the front straps inside the dress about 3″ out from the center of the front of the dress and sew in place.
P1010389
 
 
P1010390
 
Almost done! Sew three buttons along one side of the back opening.  I opted to hand-sew these.  On the other side.  Pin in your elastic pieces in a similar fashion to how we did the back strap loops and sew in place.  I stitch over this a few times since it’ll be getting pulled on.


P1010391


P1010392
 
This style back closure will allow it to grow with your daughter.  When I made this last summer, it fit my daughter more like a dress and when I tried it on today, it fit a bit more tunic-like but still has plenty of room in the chest area and paired up super cute with a pair of capri length leggings.  Thread straps through the back strap loops, tie in a bow, and we’re done!!
 
P1010401
 
 
P1010396
 
 
The Chloe Dress Modeled


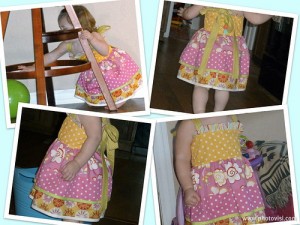
Thank you so much for having me today!  If you have questions about any of the above, please don’t hesitate to contact me via any method listed on my blog’s contact page and I’ll be more than happy to help.
 

Wow! That is a great tutorial, guys!! {Denise}


Primary Sidebar

Affiliates & Sponsors (see our disclosure policy in the top menu)

Follow Whimsy Couture

  • Facebook
  • Instagram
  • Pinterest
  • Twitter

Search For A Blog Post

Search For A Pattern

Product Categories

  • Boys Sewing Patterns
  • Girls Dress Sewing Patterns
  • Girls Jacket Sewing Patterns
  • Girls Pants & Skirts Sewing Patterns
  • Girls Romper Sewing Patterns
  • Kids Hats & Scarves Sewing Patterns
  • Ladies Sewing Patterns
  • Miscellaneous Sewing Patterns
  • Patterns
  • Pet Bed Sewing Patterns
  • Uncategorized
  • Home
  • Shop
    • Tops & Dresses
    • Pants & Skirts
    • Capes & Jackets
    • Rompers & Overalls
    • Ladies Sewing Patterns
    • Boys Sewing Patterns
    • Hats & Scarves
    • Miscellaneous Sewing Patterns
    • Pet Bed Sewing Patterns
  • My Account
    • Checkout
    • Cart
    • Logout
  • Affiliate Area
    • Info About The Affiliate Program
  • Blog
    • Whimsy Couture
      • Free Tutorials
      • Free Patterns
      • Pattern Sales
      • Giveaways
      • Pattern Shop
      • Reviews
      • Software for PDF patterns
    • DIY Crush Free Patterns & Tutorials
  • About
  • FAQ
  • Contact
  • Disclosure Policy

© 2025 · Elise Genesis WordPress Theme · by One Happy Studio

This website uses cookies to improve your experience. We'll assume you're ok with this, but you can opt-out if you wish.Accept Read More
Privacy & Cookies Policy

Privacy Overview

This website uses cookies to improve your experience while you navigate through the website. Out of these, the cookies that are categorized as necessary are stored on your browser as they are essential for the working of basic functionalities of the website. We also use third-party cookies that help us analyze and understand how you use this website. These cookies will be stored in your browser only with your consent. You also have the option to opt-out of these cookies. But opting out of some of these cookies may affect your browsing experience.
Necessary
Always Enabled
Necessary cookies are absolutely essential for the website to function properly. This category only includes cookies that ensures basic functionalities and security features of the website. These cookies do not store any personal information.
Non-necessary
Any cookies that may not be particularly necessary for the website to function and is used specifically to collect user personal data via analytics, ads, other embedded contents are termed as non-necessary cookies. It is mandatory to procure user consent prior to running these cookies on your website.
SAVE & ACCEPT